Monday, February 27, 2012

Unhealthy Eating/Drinking Habit Confession


With Spring and Summer quickly approaching, I (along with many other women across the country) am thinking more about eating right and focusing on healthier habits.


One of my favorite ways to gain inspiration for this (and basically anything else) is to peruse Pinterest for healthy eating tips and exercises. Pinterest is chock-full of great motivation and tips for keeping your cravings at bay. However, as I go through all of these great tips and ideas I can't help but feel complete mortification when I realize how badly I eat sometimes. Actually, I seem to have the biggest problem in what I choose to drink.

Here is the very real but very embarrassing truth: my typical day consists of coffee in the morning (1-3 cups), caffeine in the afternoon (sugar-free Red Bull or Diet Coke) and to end my day, a glass of wine. This is as I said, a typical day for me. How HORRIBLE is that?! To sum it up I am totally addicted to caffeine and then top off my day with sugary wine.


I realize this is so not good for me. It just isn't healthy. But here is my issue: I love drinking it so much, and since it all fits into my daily calorie goal, I have no motivation to stop. I suppose it's like smoking or any other bad habit; if you don't really, TRULY want to quit then you don't. And I just don't want to :( I love coffee, diet pop and wine. As long as I'm within my calorie goal, how do I feel motivated to stop? The scary info about ingredients in these items doesn't even deter me. I should say that I think a lot of my bad food/drink habits are the factor of emotional eating or drinking. I work and attend graduate school FULL TIME. Sometimes I feel like coffee is this happy, little victory in my morning... and the same with the other drinks. Again, what a horrible habit. Clearly I have to learn to channel my emotions into different outlets. Some of you may think, "I've never done that!" but can you honestly say you've never had a time when you looked forward to relishing a special meal? Particularly after a stressful week at works or after studying for hours on end? I think it's an easy trap to fall into. Unfortunately if I'm honest with myself, until I'm finished with grad school all I can realistically do is cut back on the bad stuff instead of eliminating it all together.


Do you have a shameful food or drink habit that you can't seem to give up and frankly don't want to?


~Christi

Sunday, February 26, 2012

Sophisticated Finds: Beauty Product Miracle "BB Cream"

My Sophistication Muse, Audrey Hepburn
Sophisticated Finds revolves around my favorite beauty discoveries, techniques, fashion trends and anything else "pretty" that catches my eye. I look forward to sharing these ideas with you and hope to hear your suggestions and feedback as well! I am no expert at beauty or fashion by any means but perhaps that will make my thoughts more relatable. Simply put, I'm just a girly-girl navigating my way through the fabulous finds I come across.

...

Have any of you ladies heard of the new-to-America product, BB Cream?
BB Cream (aka Blemish Balm, Beauty Balm, Blemish Base, Beblesh Cream) is already a huge success in Asia but it is just starting to drift over to the
United States.


From everything I've gathered, women in Asia love it simply for all of the many benefits packed into just ONE product. BB Cream is said to combine the benefits of primer, blemish coverage, skin tone correction, and lotion IN ONE PRODUCT and I am pretty sure there are certain BB creams that include even more benefits than this!
If you'd like a more thorough description you can read about it on daily glow.
The more and more I read about it the more I wanted to try it.
And well, you know me, I gave in ;)


I wanted a BB Cream that woul control my t-zone (my ultimate goal!) while providing some of these other great benefits. After a little "Googling" I settled on Etude House BB Magic Cream (Refreshing) which is for oily skin.


I should also mention that from the "research" I've conducted there is a very big difference between the new BB Creams in the American market and traditional BB Creams found in Asia. Garnier and Clinique have recently come out with their versions of BB Cream but from what I've read they are really just tinted moisturizers. I was very much intrigued by Clinique's version but then I read it had fine glitter in it. Glitter or shine of any kind is a no-no if you have oily skin or a t-zone and want to avoid drawing attention this (i.e. products like Revlon Photo-Ready Mousse won't help shiny skin). Unfortunately, Clinique was out. Anything else I read about Garnier's BB Cream was unimpressive as well. When I looked on Sephora the only other options were out of my price range. SO this is how I ended up choosing Etude House BB Cream and I was able to purchase it via Amazon since it is not sold at stores in the USA. (**UPDATE: I was able to find it with cheaper shipping on EBay!) I know this will turn some of you off because you can't buy it at your local drugstore or ULTA but honestly, I was so happy with this product I wanted to right a review about it.

So what exactly did I love about the product? I should say I haven't been using it long enough to notice any improvement in the overall condition or tone of my skin. We'll see if I notice this later. So far I have really enjoyed the ease of the application and the coverage. You can apply it with your fingers like tinted moisturizer but I like to use a foundation brush. The coverage is a little better than a tinted moisturizer but it isn't heavy or cakey, which I love. It only comes in one color and it goes on a little light at first but it miraculously adjusts to your natural skin tone. Also, a little goes a long way so you won't speed through this product.

My absolute FAVORITE thing about this product is that it is the very first foundation type product that I have tried that does not leave me with a shiny t-zone by lunchtime.

The first time I tried it I could NOT believe it when I checked its wearability mid-day. NO SHINE! I do like to set it with the E.L.F. Mineral Booster Loose Powder I suggested before but even without it the typical t-zone shine was nowhere to be found.
BEAUTY PRODUCT BREAKTHROUGH! WOO HOO!!!


Yes Ladies, I was jumping for joy ;)

Since BB Cream is making it's way through brands like Clinique and Garnier I can only hope in the next year or two Drugstore brands will develop their own versions. We'll see what happens! Until then I had to let you know about my latest discovery.

Have a great week, everyone!

~Christi


Friday, February 24, 2012

DIY Pantry Door Redo #1

Back in June, I painted the cupboards of my new kitchen black (Kitchen Redo #2: Black Cupboards & Some Extras) and planted a little bug on my plans for this super plain pantry door.
I have been gathering my ideas (thanks to Pinterest and Houzz) and have found so many cute ideas for a plain pantry door and I thought I would share a few with you.

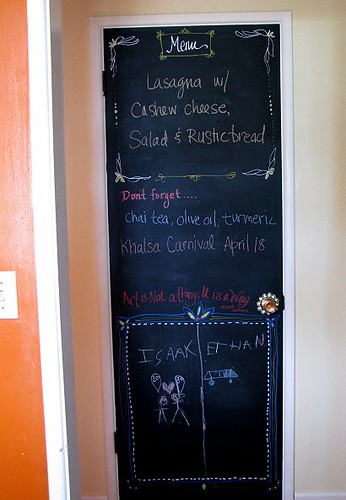
At first I was thinking about a chalk board door. Great for writing future menus, plans, grocery lists, and a place for Aiden to draw. I loved the curved arch on the door below. However, I have a flat door so I am not sure how that would work on my door.

Here is another chalk board door. I love the way they have used chalk markers to decorate the door. I think the chalk is great, but I think of the chalk mess and wonder if it's all worth it.
source

Then there is this super cute framed magnetic board that could be attached to the front of my pantry. The only problem I see with this is it might start looking cluttered. (BTW have you checked out the blog I got the image from, thehouseofsmiths.com, it's pretty awesome!)

I saw this photo below and though I know that it's a front door of someone's house, I really liked the illusion of a frame the squares added. I thought it might add a nice little decorative feel to the door without looking like a strange black door in the kitchen.
source

Then there is always the option of a dry erase pantry door like the one below. Very cute with the paisley pattern on the door, but then again I have a flat, ugly door. Also, I am not sure I can trust my toddler with markers and I would like this door to serve as an activity space for him while I cook.

And finally, I could always go with the cute frame option: one cork, one dry erase, and maybe one magnetic. I think this idea would be very cute, but I worry about the toddler ripping off the frames attached to the door and how do you attach them when you have a cheap, hollow, door like I do?

There are so many cute ways to redo your pantry door out there, the ideas are endless! I guess decisions have to be made and I will show you what I decided to do on the next blog about the door!


Like this post?
Pin It

Monday, February 20, 2012

40 Days & 40 Nights Cleaning Challenge

No matter what your religion, most people have hear of Lent and the practice that many Christian religions observe a period of fasting, repentance, moderation and/or spiritual discipline. In my family, each year for Lent we would either abstain from something we enjoyed or make it a personal goal to work on something we didn't enjoy.

Most of the years I would give up coffee, chocolate, candy, pop, or something small like that. This year though, I have decided to try to achieve a goal of mine that has been plaguing me the last few months: keeping my house clean.

I know I have blogged about things around my house I don't mind being messy (Keeping A Dirty Home). However, somehow in the last few weeks I have seemed to find excuses to do anything around my house but clean. I should correct myself, clean well. We have always been good at doing the dishes nightly, vacuuming weekly, picking up small things...but as of late most of the days our house looks like a tornado hit it.

With that in mind I have decided to start a daily cleaning chart to help me stay on task with my cleaning. (You can download my cleaning schedule here.) The chart is really tailored to my house, but would be very easy to modify and adjust it to your own home. Here is the list basically:

Monday
Dishes (Wash all dishes, wipe off counters, & sweep floor)
Make the Bed
Vacuum Living Room, Kitchen, Entryway, Laundry Room
Dust surfaces, including furniture, objects, and light fixtures in rooms listed above
Vacuum and mop kitchen floor

Tuesday
Dishes (Wash all dishes, wipe off counters, & sweep floor)
Make the Bed
Change and launder bath mats, towels, and washcloths in bathrooms
Clean toilets, bathtubs, showers, and sinks
Dust light fixtures in bathrooms
Vacuum and mop floors in bathrooms, Aiden's room, master bedroom
Wipe mirrors in bathrooms

Wednesday
Dishes (Wash all dishes, wipe off counters, & sweep floor)
Make the Bed
Vacuum and mop kitchen floor
Dust staircase banisters, living room bookshelves, bedroom dressers.
Vacuum stairs and landings

Thursday
Dishes (Wash all dishes, wipe off counters, & sweep floor)
Make the Bed
Vacuum Living Room, Kitchen, Entryway, Laundry Room
Dust surfaces, including furniture, objects, and light fixtures in rooms listed above

Friday
Dishes (Wash all dishes, wipe off counters, & sweep floor)
Make the Bed
Wipe hand and pet prints from windows and glass doors
Dust surfaces and objects, including furniture, light fixtures, and electronics
Wash Aiden's high chair cover & high chair
Vacuum and mop kitchen floor

Saturday or Sunday
Dishes (Wash all dishes, wipe off counters, & sweep floor)
Make the Bed
Discard foods and beverages past their prime in fridge
Wipe out fridge and outside of fridge
Empty trash bins
Water plants

Every Two Weeks
Laundry (if we haven't done it already)
Wipe tops of washer & dryer
Scrub down tub and shower surrounds
Launder bed sheets
Dust shelves and storage bins
Wipe surfaces in kitchen back of oven, front of refrigerator & cupboard doors.
Wipe the inside of the oven and microwave.
Vacuum the basement.

So even if you aren't a spiritual person, but you are wanting to try to keep your house clean. I invite you to take this 40 days and 40 nights Cleaning Challenge with me. I figure that if you mark off a few tasks each day, your house should stay somewhat clean throughout the week. Well, that's my goal anyways. Wish me luck and I will post back 40 days and 40 nights from now!


Like this post?
Pin It

Sunday, February 19, 2012

Sophistication Sundays - 5 Beauty Rituals

My Sophistication Muse, Audrey Hepburn
Sophistication Sunday revolves around my favorite beauty finds, techniques, fashion trends and anything else "pretty" that catches my eye. I look forward to sharing these ideas with you and hope to hear your suggestions and feedback as well! I am no expert at beauty or fashion by any means but perhaps that will make my thoughts more relatable. Simply put, I'm just a girly-girl navigating my way through the fabulous finds I come across.

...

Since I wrote a post last week about some of my favorite Drugstore products I thought it would be beneficial to discuss some of the items I include as a regular "beauty ritual." I know the key to beautiful hair and skin is healthy hair and skin. So these are some of the products I use on a regular basis to keep my skin and tresses at their finest.


Neutrogena Anti-Residue Shampoo

Anti-Residue Shampoo is a shampoo treatment that instantly removes up to 95% of dulling residue caused by shampoos, conditioners and styling products. It cleans hair thoroughly and easily rinses away.

Let's face it, many of us use a multitude of products on our hair every week. My hair product sins range from dry shampoo to hairspray to serum to pomade to shine spray. Phew, whatever we have to do to tame our unruly hair, right? After 6 days of product overload this shampoo helps give my hair a fresh start by removing the dulling residue. However, be sure not to overuse this product. Overuse of this product will strip your hair and just create more problems like fly aways and dry ends.


Organix Brazilian Keratin Therapy

A creamy blend of cocoa butter and keratin proteins drench each strand with moisture while avocado oil and coconut oil reduce frizz, add illuminating shine and lasting smoothness. The rich Brazilian coconut oils and fortifying keratin give a luxurious, salon-style deep conditioning treatment that smoothes, straightens and adds sensational shine.


While it is important to remove product residue it may be even more crucial to restore moisture to hair; Especially during the harsh winters! With this in mind I apply a deep conditioning hair masque once a week. For awhile I used Organix's Moroccan Argan Oil Intensive Treatment but when I fell in love with the Organix Brazilian Kertain line I made a switch! I picked up Organix Hydrating Keratin Masque and couldn't be happier with the results. First of all the scent... Omigosh it is HEAVENLY! I don't even know how to describe it, it's like putting chocolate cake on your hair! haha. Seriously though, the scent is intoxicating and rich. While in the shower I apply this root to tip and twist it up into a clip until the end of my shower. Deep conditioning is especially important during the dry winter months.


Aveeno Nourish + Condition Leave-In Treatment


Aveeno Nourish + Condition Leave-In Treatment does much more than nourish and condition - it quenches the thirstiest hair with a fusion of deep conditioners and moisturizers, recharging it with healthy new life. Hair is instantly revitalized and scientific studies show that just three uses helps repair dry damaged hair.

Leave-in conditioner was something that was part of my routine as a child; especially when I frequented the pool nearly every day during the summer! I quickly learned that there was no reason to by pass this form of conditioner even though I wasn't a kid at the pool anymore. Once I started using the leave-in treatment I noticed my hair felt softer and looked shinier. I use it faithfully and really believe it helps keep my hair moisturized and protected from the harsh winter weather.


Queen Helene Mint Julep Masque

Mint Julep Masque is the original natural home treatment developed by a dermatologist that helps dry up acne pimples, rinse away blackheads and shrink enlarged pores. Simply apply Mint Julep Masque to your clean face and neck. Within minutes it firms and hardens, drawing out impurities from your pores. After the masque is removed, your skin will feel clean, refreshed and smooth.

Not only is this masque amazing but it is SUPER affordable! I purchased mine at Walgreen's for around $3 and the bottle lasts forever. I apply this to my face once a week and it helps to treat current breakouts as well as cut down on blackheads. The only downside is that the green masque is a bit stereotypical, i.e. it's gives you the look of the mom on sitcoms that would scare little kids away. My hubby seems to put up with it though so I guess it isn't that scary ;)


Tree Hut Coconut Lime Shea Sugar Body Scrub


Photo Source

Delight your senses as you smooth your skin with the fresh, botanical combination of coconut and lime. The sugar grains will softly smooth away excess dry skin while Shea and Coconut Oil replenish moisture to your skin.

Since I switched to the non-tanning bed lifestyle last summer I knew I had to find a great scrub for exfoliation. I picked this one up at my local Wal-Mart because I liked the smell (so summery!) and because it was fairly inexpensive. I use the scrub once a week and am always amazed afterward how soft my skin feels.

...

So what are your beauty rituals? Do you have a product you use weekly or something you swear by?
Let me know in the comments below! I love finding great new products :)


~Christi


Thursday, February 16, 2012

335 Calorie Mug Brownie!

My husband I were craving brownies the other night, but the problem is that when I make brownies we end up eating the whole pan. Now this may not sound like that bad of an idea (in fact, some people would say it sounds delicious!) but did you know that the average brownie mix baked is 3400 calories per pan! That's an extra 3400 calories a week or almost a pound. (3500 calories = 1 pound)

Lately I have been seeing several versions of Mug Brownies pop up on Pinterest. In an effort to satisfy our sweet tooth and have brownies I thought I would give it a try. I changed ingredients (I always seem to when I cook) and made the calories as low calorie as I could without compromising taste.

This Mug Brownie is now 335 calories, which I know sounds like a lot, but compared to the alternative it's really not that bad. This Mug Brownie gives you a nice sized portion, it's super fast, and best of all there is no tempting leftovers hanging around! I hope you enjoy!

You will need:
2 tablespoons light butter
2 Tablespoons Splenda
4 Tablespoons Flour
2 Tablespoons Sugar
2 Tablespoons Cocoa powder
2 Tablespoons Water

And these directions can't be easier! First, melt 2 tablespoons of butter in a mug.
Pour in 2 tablespoons of Splenda,
4 tablespoons flour,
2 tablespoons of sugar,
2 tablespoons of cocoa powder,
and 2 tablespoons of cold water.
Now stir until somewhat smooth.
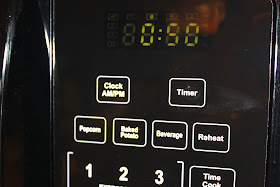
Pop into microwave for 50 seconds.
Remove from microwave and enjoy your chocolatey bliss!
And for those of you wanting the nutrition information:


Like this post?
Pin It

Wednesday, February 15, 2012

Entryway Remodel (DIY Wall Coat Rack & Shelf) Complete

Last week I blogged about the death of my coat rack and how it was time for a new coat solution for our front entryway. Really a new front entryway.
Since we moved in, my entryway has been in a major need of a remodel and I am happy to say it is finally complete with less than a day of work.
My entryway went from above to this:
A vast improvement! Building this shelf was so easy, so I thought I could do a quick DIY on the subject.

Here is what you will need for this project:
Qty 2 L-Brackets = Hobby Lobby for $7.50 (50% off sale)
Qty 6 Hooks = Hobby Lobby for $2.00 (50% off sale)
Qty 1 1"x8"x8" pine board = Home Depot $7.48
Qty 1 1"x12"x8" pine board = Home Depot $14.98
Qty 12 2" screws (Quantity depends on number of holes in your L-brackets on the side that attach to the wall and how many screws you want to attach your coat rack to the wall with.)
Qty 20 1/2" screws (Quantity depends on the number of holes in your hooks & the number of holes on your L-brackets that attach to the shelf.)
Stain & Polyurethane (I had left over on hand.)
Stud Finder
Level
Drill

I thought I would break down my timeline of making this shelf.

7:30am - Find studs with stud finder and determine the length desired for your shelf. You NEED to make sure that you install the shelf and the coat rack into studs. There will be points where I am sure this thing is stuffed full of coats and the last think you want is it to rip out of the wall.
Once you mark your studs, determine from there how long to make your shelf. I decided to make my shelf 68 inches long and the coat rack 66 inches.
8:00am- The kiddo is busy watching Super Why, so I sneak downstairs (we put in a shop this winter) to cut my boards to the length I need.

9:00am - Nap time for the little guy, so I make my way downstairs to sand and stain my boards. (I bought boards in pretty good shape so I just need to use 200 grit on them to smooth them out a little.)

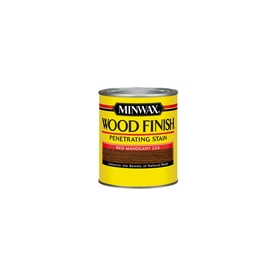
I used leftover stain from my Shoe Storage Bench in Red Mahogany that I just love the color of, so I decided to use that for this project. Plus, it matched my large toy box/storage bench that already resides in the entryway.

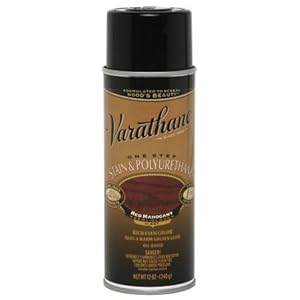
10:00am- Stain is dry, I wanted to have a light coat of polyurethane over the top to add a little protection. I had leftover Varathane (stain and polyurethane in one) from the Rocking Chair, so I used that for my top coat. (Have I mentioned how much I LOVE this stuff!) . It dries pretty fast and is easy to apply!

source

10:30am- Time to hang the brackets. To start, measure how high you would like your shelf and mark the walls on the studs. Line up the brackets and make marks for the drill holes. Before I made my marks I used a level to make sure my brackets were not tilting to one side or another.
(As a side note, my brackets have 4 holes on each to attach to the stud. To make sure I was in the center of the stud, I nailed in a small finishing nail into the wall where I marked to drill hopes to make sure I would hit the stud. Good think I did this too, because one of them was only partially on the stud. The small holes of a finishing nail are easy to cover up and prevented me from having half of my bracket into the stud and the other just into the sheet rock.)

Using your 2" screws, attach your brackets to the wall with a drill. You will end up with two L-brackets attached to the wall like below.
But you will still have an ugly light fixture :(
1:00pm- Time goes so slowly waiting for things to dry! The poly coat is finally dry and time to make sure my shelf is level. Place your board on the L-brackets and....
see how good you are at measuring. Luckily, I measured about 5 times so mine came out level. Now using your 1/2" screws, attach the board to the L-brackets from the bottom.
1:30pm- Attach the hooks to the main coat rack board. The spacing of the hooks are up to you, but I decided (and have found it easiest) to start on the outsides and work my way in. I made each outside hook 3 inches from the edge of the rack and then spaced them evenly on the inside. Using the rest of your 1/2" screws, attach the hooks to the board.
2:00pm- Hang the coat rack on the wall. To do this, mark where the studs are under the shelf. This will be where you want to drill screws through your coat rack into the wall. I marked them with a line just above where I want to hang my coat rack. With some help, someone can hold up the shelf while you screw it in. I attached two screws, one on top and bottom, on two studs under the shelf. If you notice from the picture there is no hook. I removed the hook so I could drill the hole easier.
Reattach your hook if needed, and enjoy your new shelf and coat rack!
However, my job was not finished there. I had an ugly light fixture to still replace. Luckily, I found a new one for $8 on clearance at Menards and using my guide to hanging a light fixture, I installed a new one.
Also, I found some baskets around the house, a few pictures, and one of my metal scupture to complete the decorating part. One basket holds hats and the other gloves. Though I can't lie, I haven't exactly filled the back frame yet. Those are the pics that came with the frame :)
I love the way the entry way looks and it works for our coats.
And we have completely filled it up already!


Like this post?
Pin It