Wednesday, February 15, 2012

Entryway Remodel (DIY Wall Coat Rack & Shelf) Complete

Last week I blogged about the death of my coat rack and how it was time for a new coat solution for our front entryway. Really a new front entryway.
Since we moved in, my entryway has been in a major need of a remodel and I am happy to say it is finally complete with less than a day of work.
My entryway went from above to this:
A vast improvement! Building this shelf was so easy, so I thought I could do a quick DIY on the subject.

Here is what you will need for this project:
Qty 2 L-Brackets = Hobby Lobby for $7.50 (50% off sale)
Qty 6 Hooks = Hobby Lobby for $2.00 (50% off sale)
Qty 1 1"x8"x8" pine board = Home Depot $7.48
Qty 1 1"x12"x8" pine board = Home Depot $14.98
Qty 12 2" screws (Quantity depends on number of holes in your L-brackets on the side that attach to the wall and how many screws you want to attach your coat rack to the wall with.)
Qty 20 1/2" screws (Quantity depends on the number of holes in your hooks & the number of holes on your L-brackets that attach to the shelf.)
Stain & Polyurethane (I had left over on hand.)
Stud Finder
Level
Drill

I thought I would break down my timeline of making this shelf.

7:30am - Find studs with stud finder and determine the length desired for your shelf. You NEED to make sure that you install the shelf and the coat rack into studs. There will be points where I am sure this thing is stuffed full of coats and the last think you want is it to rip out of the wall.
Once you mark your studs, determine from there how long to make your shelf. I decided to make my shelf 68 inches long and the coat rack 66 inches.

8:00am- The kiddo is busy watching Super Why, so I sneak downstairs (we put in a shop this winter) to cut my boards to the length I need.

9:00am - Nap time for the little guy, so I make my way downstairs to sand and stain my boards. (I bought boards in pretty good shape so I just need to use 200 grit on them to smooth them out a little.)

I used leftover stain from my Shoe Storage Bench in Red Mahogany that I just love the color of, so I decided to use that for this project. Plus, it matched my large toy box/storage bench that already resides in the entryway.
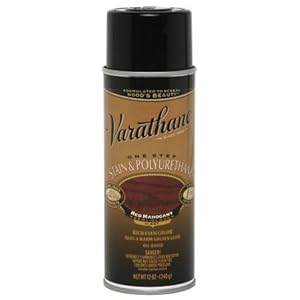
10:00am- Stain is dry, I wanted to have a light coat of polyurethane over the top to add a little protection. I had leftover Varathane (stain and polyurethane in one) from the Rocking Chair, so I used that for my top coat. (Have I mentioned how much I LOVE this stuff!) . It dries pretty fast and is easy to apply!

source

10:30am- Time to hang the brackets. To start, measure how high you would like your shelf and mark the walls on the studs. Line up the brackets and make marks for the drill holes. Before I made my marks I used a level to make sure my brackets were not tilting to one side or another.
(As a side note, my brackets have 4 holes on each to attach to the stud. To make sure I was in the center of the stud, I nailed in a small finishing nail into the wall where I marked to drill hopes to make sure I would hit the stud. Good think I did this too, because one of them was only partially on the stud. The small holes of a finishing nail are easy to cover up and prevented me from having half of my bracket into the stud and the other just into the sheet rock.)

Using your 2" screws, attach your brackets to the wall with a drill. You will end up with two L-brackets attached to the wall like below.
But you will still have an ugly light fixture :(
1:00pm- Time goes so slowly waiting for things to dry! The poly coat is finally dry and time to make sure my shelf is level. Place your board on the L-brackets and....
see how good you are at measuring. Luckily, I measured about 5 times so mine came out level. Now using your 1/2" screws, attach the board to the L-brackets from the bottom.
1:30pm- Attach the hooks to the main coat rack board. The spacing of the hooks are up to you, but I decided (and have found it easiest) to start on the outsides and work my way in. I made each outside hook 3 inches from the edge of the rack and then spaced them evenly on the inside. Using the rest of your 1/2" screws, attach the hooks to the board.
2:00pm- Hang the coat rack on the wall. To do this, mark where the studs are under the shelf. This will be where you want to drill screws through your coat rack into the wall. I marked them with a line just above where I want to hang my coat rack. With some help, someone can hold up the shelf while you screw it in. I attached two screws, one on top and bottom, on two studs under the shelf. If you notice from the picture there is no hook. I removed the hook so I could drill the hole easier.
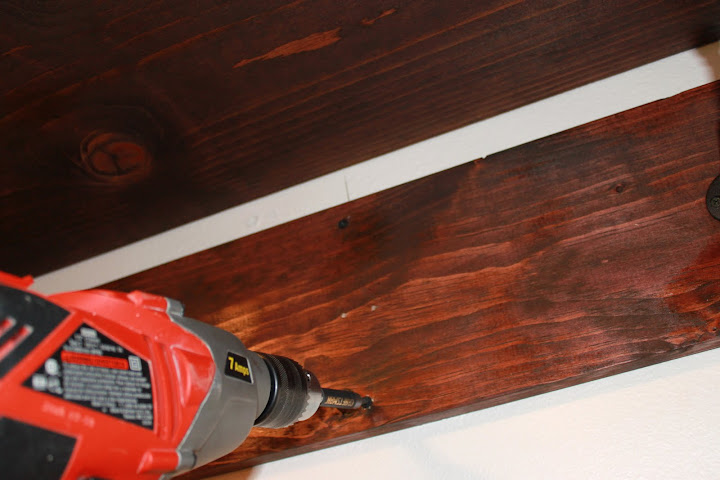
Reattach your hook if needed, and enjoy your new shelf and coat rack!
However, my job was not finished there. I had an ugly light fixture to still replace. Luckily, I found a new one for $8 on clearance at Menards and using my guide to hanging a light fixture, I installed a new one.
Also, I found some baskets around the house, a few pictures, and one of my metal scupture to complete the decorating part. One basket holds hats and the other gloves. Though I can't lie, I haven't exactly filled the back frame yet. Those are the pics that came with the frame :)
I love the way the entry way looks and it works for our coats.
And we have completely filled it up already!


Like this post?
Pin It


Tuesday, February 14, 2012

Valentine's Day Breakfast - Heart Shaped Pancakes & Frog In The Hole

I never use to celebrate Valentine's Day, but for some reason as I have gotten older I have started too. Last year I planned out a dinner of heart shaped pizza, lovey labeled wines, and heart brownies (see post here.) This year I decided to make something different because my kiddo is now old enough to eat food. I decided on a loving breakfast of heart shaped pancakes and heart shaped frog in the hole.

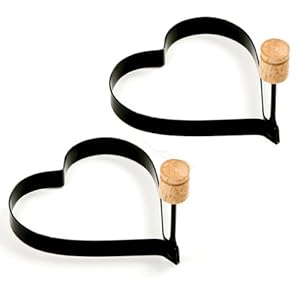
The whole idea came about when I was at Walmart and saw these cookie cutters for $2.88.
Now I have seen these type of pancake makers at stores before, but always thought they would be something I wouldn't break out very often. The cookie cutters could be used for a variety of functions and were super cheap!
My cookie cutters are metal and metal conducts heat, so I need a way to pick them up out of the pan and decided to use an old cork
I just cut a slit in it big enough to pick up the cutter from the pan.
I placed my cookie cutters in a pan with some oil and waited for them to heat up.
I mixed up some pancake batter.
I poured my batter in and waited for it to get super bubbly. (Notice my center from my frog in the hole.) When the pancakes had lots of bubbles, I used the cork to remove the hot cookie cutter.
Then I flipped each over and waited for the other side to cook.
After those two were cooked, I sprayed down the cookie cutters with some vegetable oil and started on the rest of the batter. I ended up with this beautiful stack of pancakes:
It was a pretty large stack, but my husband and son ate them up.
Well, I gave my son one of them. I am a little strange of a Mom and try to give my kiddo protein in the morning. I think having just carbohydrates and sugary syrup just isn't the healthiest for a young kiddo. Breakfast #2 for my son was a frog in the hole. If you haven't heard of these, it's just a piece of bread with an egg in the middle.

I grabbed the middle size cookie cutter and cut my hole out of my bread.
Keep the inside part, it makes for cute toast on the side. I cooked this piece with the pancakes in the larger pan.
With a little bit of oil in the pan, I put the bread in a pan and
cracked an egg in the center. My son likes salt & pepper on his eggs so I added that.
Once the top of the egg has set, I flipped it over and let it cook until the yoke was hard.
Served with the toasted center, my kiddo ate it up!
Hope you and your loved ones have a wonderful Valentine's Day! Even if you don't like/celebrate the holiday, just use it as an opportunity to do something nice for the ones you love.


Like this post?
Pin It

Wednesday, February 8, 2012

Entryway Remodel (DIY Wall Coat Rack & Shelf)

First of all, I want to start this blog out with a tribute, a remembrance, a eulogy....to my coat rack. You have been there through so many years and it is sad to see you go. My coat rack was originally purchased when I moved out of my parents house (12 years ago) and it has lasted through all my moves. It has survived many goodwill piles, only to be pulled out and used again. It's been there through the good, the bad, and the ugly....coats. It has been taken apart, fallen over, held the heaviest load of coats and still lasted until now. Alas, the other day, the coat rack died :( The bottom bolt stripped completely out, with no way of repair. It now stands crooked and falls over frequently. In fact, this morning it fell over and smacked me in the head, and that was the moment when I decided it had to be put down.
Really, my entryway has been in a major need of a remodel. I don't plan on doing any painting, just a new way to organize the coats and maybe if my husband lets me, replace the light fixture.
Now this project probably sounds familiar, after all it was just a few months ago when I built the Shoe Pallet Storage Bench for my mud room.
Which has been so helpful, but in my current entryway I already have a large chest that serves as a bench and toy box. I wanted something somewhat quick and I have had some ideas in mind. Here are a few examples I found of how I would like to remodel my entryway:

In the pic below, I love the baskets for some extra storage. It's a great idea for all the gloves and hats we need during the winter time.
Wainscot in mudroom eclectic entry
If I don't need the storage, having a shelf above the hooks adds extra area for decorating too.
Clean Laundry Room traditional laundry room
I love the framed numbers and baskets, but not quite sure I really need numbers in the entryway.

source


I love the really large hooks on this coat rack.


Yesterday, I was at Hobby Lobby and I found some super big coat hooks (like in the picture above) and matching cast iron L-brackets, perfect for a shelf! My idea-- make a shelf with the L-brackets and place a rustic piece of wood below with my large hooks attached to them. It's seems pretty simple, with the exception of me finishing the wood (which I hate sanding) but overall should be a somewhat quick project. I think for the top of the shelf, I will have a couple baskets with some frames in the middle. Enough for some extra storage if needed.

Wish me luck and stay tuned for the results!


Like this post?
Pin It

Tuesday, February 7, 2012

The Joys Of Toddlerhood Part 1

My son is officially 15 months and 2 weeks old today and more active than ever! Usually, all you hear about the toddler years are the fighting, yelling, and the naughtiness of a toddler, but I wanted to write a little short blog on the joys of toddlerhood.
source

Every morning when I go in to pick up my son from his crib, he has such excitement on his face. I would like to think that the joy is to see me (and some might be), but I think the majority of his excitement if for all the new things he knows he will learn that day. It's amazing to think that a short 15 months ago he was just a little baby that would barely move.

Each morning we wake up, take out the dog, make our hike down the stairs to put food in the dog bowl, and make the great climb back up the stairs to begin the day. (I like to think the climb up the stairs is his little version of Mt. Everest.) He makes me coffee (well I set it all up, he pushes the button) and I usually make him oatmeal. With spoon in hand, in about 30 minutes, he has managed to eat half of the oatmeal and use the rest for a nice moistrizing facial mask.

After breakfast, the day goes pretty much on a schedule. We play, he naps, eat lunch, play again, nap, play, dinner, and bedtime...you get the idea. Our days are somewhat of a routine but the moments when we play are the best and they change daily. He has almost mastered the names of all the animals in his books. (Well, he can't say them, but I can ask him and he will point at the picture.) I can ask 'what sound does a snake make' and he will boastfully respond "sssssss" or 'what sound does a piggy make' and he will give me the biggest snort you have ever heard from a little boy. We are still working on the sound a duck makes, but all he can muster is a "duck duck" instead of a "quack quack", I am sure those "q's" are a hard one to learn.

He loves to watch the birds on our bird feeders and giggles each time a new one flies over (counted 11 the other day!) We walk up and down our driveway, which is almost a quarter of a mile each time. He has mastered the log roll, working on the somersault, and hopefully we can start the cartwheel soon. He's a tough kid who falls down on his face several times a day and makes little sound if any. He carries his monkey everywhere he goes and says "hot" at anything that is Mom's food. We read about 30 books a day and he makes engine noises while playing with his trucks. He points at everthing, claps for himself when he does something he is proud of, and runs around the house like a little maniac.
source

I still look forward to when he learns to use his imagination, which he has not quite grasped the concept yet. (I made him some x-ray glasses out of Duplo blocks yesterday and he was not impressed.) There are moments of the beginning temper tantrums, him shaking his head "no", whining, and picky eating which I am sure will get worse before they get better. I have responded calmly and cooly and hope to keep that up.

Despite the bad moments, all the fun moments of watching him learn, explore, and experiment are worth every penny. I hope this posts makes you look forward to your little one reaching this fun toddler stage or makes you remember when your child was his age. I understand these years are some of the best you will remember and I hope to relish in the moment while I have it.

"For infants and toddlers learning and living are the same thing. If they feel secure, treasured, loved, their own energy and curiosity will bring them new understanding and new skills." - Amy Laura Dombro

I leave you with this video of him I find hilaroious. We took him to the Children's Science Museum and he learned that if he jumps on the scale he can make the needle move. We had quite the laugh watching him.


Like this post?
Pin It

Thursday, February 2, 2012

Healthy Oven Fried Chicken

There are moments where foods that are totally not healthy for you sound so delicious and you just can't resist them. I love my classic comfort foods: fried chicken & mashed potatoes, shepherd's pie, meatloaf, mac & cheese....etc. The other night I was CRAVING some fried chicken, mashed potatoes, and gravy. We are still on our eating healthy routine, so I tried to make a "healthier" version of fried chicken. Fried chicken, with no frying involved! The crumb coating I used to dip the chicken in cooked up crispy and delicious and kept the chicken very moist. I hope you enjoy! (My battery was dead on my camera, so the pic I found is very close on how it turned out...complete with my skin on mashed potatoes!)

source

1 cup Chex Rice cereal
1 cup panko bread crumbs
1 teaspoon salt
1/2 teaspoon cayenne pepper
1 teaspoon sweet paprika
1 teaspoon freshly ground black pepper
3 tablespoons light mayonnaise
2 egg whites
1 tablespoon Dijon mustard
1 pound of boneless, skinless chicken breast

1. Preheat the oven to 400 degrees
2. Line a baking sheet and place a metal cooling rack on top of it. (The key to a "crispy" chicken is to have air baking the chicken all around, including the bottom. The cooling rack will allow the heat to circulate.) Spray cooking rack with spray oil.
3. In a food processor, grind the cereal, panko crumbs, salt, peppers, and paprika. Place crumb mixture in a dish big enough to fit each chicken breast.
4. In a shallow bowl, mix the mayo, egg whites, and mustard together until somewhat smooth. (It's going to look gross.)
5. Dip each chicken breast (both sides) in the mayo mixture then into the crumb mixture until coated well.
6. Place each chicken breast on the cooling rack, not touching.
7. Bake for about 30-40 minutes, depending on the thickness of your chicken. A thermometer inserted in the thickest part chicken should be 160 degrees F.
8. Serve with some mashed potatoes and country gravy. YUMMY!!

The Skinny: Serves 4 @ 229 calories


Like this post?
Pin It


Top 10 Products For Toddlers

It's official (for a few months now), my little baby boy is now a toddler. According to the thefreedictionary.com, a toddler is "a child between 12 and 36 months of age. During this period of development the child acquires a sense of autonomy and independence through the mastery of various specialized tasks such as control of body functions, refinement of motor and language skills, and acquisition of socially acceptable behavior, especially toleration of delayed gratification and acceptance of separation from the mother or parents. The period is characterized by exploration of the environment and rapid cognitive development as the child strives for self-assertion and personal interaction with others while struggling with parental discipline and sibling rivalry."

Wow, that was long!! However, right on when it comes to my crazy, adventurous, totally uncoordinated little boy! With the onset of toddler years, I have found some products that I honestly could not live without and I thought I would share my must have list for toddlers (in no particular order).

1. Waterproof SuperBib

I don't know about you, but I do not like doing laundry all the time. These waterproof bibs help out with that. Not only do they keep water, soup, cereal, and whatever else off my kiddo's clothes they also are easy to wash in the sink. I wash them with the high chair tray and lay them both out to dry. The material makes these bibs dry super fast and they are usually ready for the next meal in a couple hours.

2. Baby Moccasins source

I really should call these "soft leather" shoes because they aren't moccasins in the true sense, but they remind me of them. My little guy spends majority of the day in his sleeper and I slip these shoes over the bottom of his sleepers to prevent him from sliding around on the floor. The shoes have a soft leather sole on the bottom, which allow them to grip the hard floors better. Also, they form better to the kiddos chubby feet, so I think it makes it easier for him to walk around then normal shoes.

3. Baby Signing Time

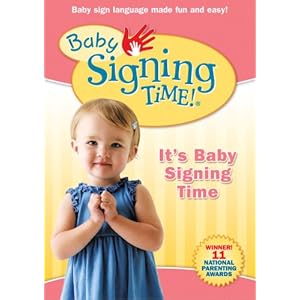
We started playing this video for Aiden when he was about 5 months old. The songs will get stuck in your head and drive you crazy, but your kid will love this video. He get's so excited every time I turn it on and he has picked up on the signing. It has been very helpful since he can't quite communicate verbally with us yet.

4. Playtex Insulated Cups
source

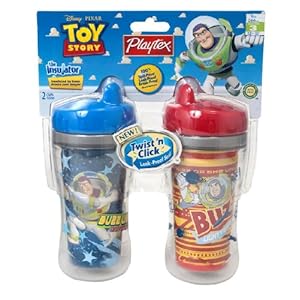
I have tried several brands of sippy cups, but I like this kind the best. They keep his milk colder, longer and they wash up easier then other brands. The inside has this rubber stopper that can easily be removed and washed in the dishwasher.

5. Baby Toothbrush (aka back teething brush)source

The young toddler years are a fun time when their molars begin to come in. It is HORRIBLE!! I found these baby tooth brushes that are suppose to help them brush their teeth, but I have found they are wonderful for his back teeth coming in. They are soft, so I don't worry about him falling with one in his mouth and he absolutely loves them. I only wish they were colored. It's hard to see them on the floor and I vacuumed up one the other day...

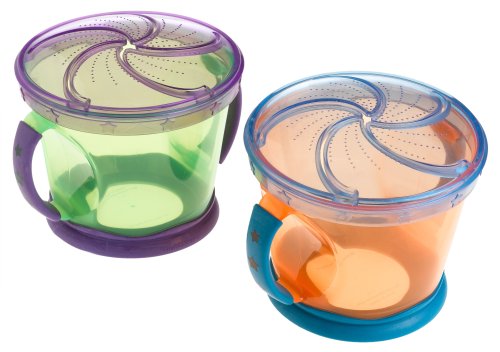
6. Snack Catchers


The snack catchers are the greatest invention! My little man loves his cheerios and these snack catchers provide entertainment. Your child has to work at opening the flaps to get a cheerio and the flaps keep most of the cheerios contained. They allow him to walk around and explore with his food, without making such a huge mess.

7. Suction Plates/Bowls
source

These plates/bowls are great for teaching your little one how to use eating utensils. I started putting Aiden's oatmeal and yogurt in these bowls every morning and sticking them to his high chair tray. These bowl are great because it allows them to learn how to use a spoon and scoop up food without the bowl sliding off the tray. At first he made quite the mess, and still does, but each day he gets better at feeding himself.


8. GoGo Squeeze Apple Sauce


I came across these at Costco one day-- I actually picked them up for my husband to take to work. I gave one to my little guy and he loved them. They are easy to keep in the diaper bag and for him to eat on the go. The unique design allows him to squeeze the apple sauce into his mouth without making a mess.

9. Sun Maid Fruit Bits

I am somewhat obsessed with dried fruit, but cutting up dried apricots and apples for my son is a little bit of pain. I found these fruit bits in the store one day and they are a staple around our household now. I keep a pack in the diaper bag for a healthy snack on the go. I will sprinkle some in his yogurt, oatmeal, or just as a fruit part of his lunch.

10. Dollar Tree Board Books

My kiddo LOVES to read, but he is not the most gentle child with books. I have already spent many of hours taping together pages of books. (OK, that's exaggerating it's been just two books.) The Dollar Tree offers these awesome board books for $1 each. The stories are short, simple, and virtually indestructible. Also, they have some foam books that can go in the bathtub and make a great teething toy.


Well, I hope you enjoyed my Top 10 products for toddlers. Do you have some favorites that you can't live without? If so, let me know. I am always looking for new things to make my life easier!


Like this post?
Pin It

Like This?- Pin It!

 
Copyright 2009 between3sisters