Sunday, January 29, 2012

Healthy Oatmeal Cranberry Blender Pancakes

Who doesn't like to wake up on a Sunday morning to some nice, hot, yummy pancakes? My friend Kami (who is a personal trainer) told me that her daughter loves blender oatmeal pancakes that she makes and I thought it would be a good morning to try to make something similar myself.

What makes blender pancakes so easy is you can pour the batter right from the blender into the skillet, with little or no mess. (Granted my pancakes still don't look uniform at all!) I ended up making up this recipe after looking online at a few blender pancake recipes. We are trying to eat healthy and low-calorie, so I doctored up this recipe to keep the calories lower and packed it full of whole grains. At 347 calories per serving, it's not the lowest calorie recipe but better than the normal pancake. Also, it serves 4 people and makes quite a healthy amount of pancakes for each person. Hope you enjoy, I know we did!1-2 tablespoons of vegetable oil
1 1/4 cups skim milk
1 1/4 cups whole wheat flour
1/2 cup old fashioned oats
3/4 cup egg substitute
1 teaspoon cinnamon
1/2 teaspoon nutmeg
2 teaspoons baking powder
1/4 cup brown sugar
1/4 teaspoon salt
1/2 cup dried cranberries

1. Pour about 1/2 tablespoon of oil into large skillet and begin heating it.
2. In a blender, combine the milk and whole wheat flour. Blend until smooth. (Scrape the sides of blender if needed.)
3. Add the oats, egg substitute, cinnamon, nutmeg, baking powder, brown sugar, and salt. Blend together until smooth.
4. Stir in the cranberries.
5. Spoon about 1/4 cup of batter per pancake onto griddle. Turn pancakes over when tops are covered with bubbles; cook until bottoms are lightly browned. Repeat process till all are cooked (using up the oil if needed.)
6. You can eat the pancakes with syrup, butter, or a dusting of powder sugar. I found because there is so much brown sugar in the recipe it was sweet enough to eat plain and I just added a few sprays of spray butter to the pancake.

The Skinny: Serves 4 @ 347 each serving


Like this post?
Pin It

Sunday, January 22, 2012

Sophistication Sundays - Current Drugstore Staples

My Sophistication Muse, Audrey Hepburn
Sophistication Sunday revolves around my favorite beauty finds, techniques, fashion trends and anything else "pretty" that catches my eye. I look forward to sharing these ideas with you and hope to hear your suggestions and feedback as well! I am no expert at beauty or fashion by any means but perhaps that will make my thoughts more relatable. Simply put, I'm just a girly-girl navigating my way through the fabulous finds I come across.

...

I decided to just do a random mash up of the drugstore favorites I've come to depend on. As my mom, sisters and myself have often discussed, there are certain things you will pay extra for (i.e. MAC concealer is my must) and other things from the drugstore that will do the job. So today I'm going to give a brief overview of a few of my current drugstore staples that I absolutely love.


1. Rimmel Fix & Perfect Primer Pro
Unique advanced formula with 5 in 1 results:
Smoothes to minimize pores, resurfaces for an even complexion, brightens skin all day, protects skin from environmental aggressors and mattifies and eliminates shine.


After searching for a long time for a primer that lasts and isn't too expensive (hello, smashbox primer!) I keep coming back to Rimmel's Fix & Perfect Primer Pro. It has a clear formulation unlike their original formula and comes with the added bonus of brightening and mattifying skin. It isn't super oily like some drugstore primers and I really think it helps control shine more than the regular primer. I'm also happy to report it doesn't have that odd gasoline-like smell I've noticed in Hard Candy and E.L.F. primer. For now I am pleased with with this stuff and will keep using it unless I find something better!


2. Maybelline Dream Matte Mousse
Revolutionary air-soft mousse provides perfecting coverage for 100% velvet-matte perfection.
Ideal for normal to oily skin.

Dream Matte Mousse - Pack Shot

Although I still love tinted moisturizer there are times when I want a more flawless finish. When I want a more "flawless" finish I also want to use a product that won't make my face a total oil slick. As I have aged my skin has progressed from super dry to "normal to oily." Yes, I now know what the dreaded t-zone is. So the last thing I want to do is contribute to this problem. So when I am looking for great coverage my go to product is Maybelline's Dream Matte Mousse (not to be confused with Maybelline's Dream Smooth Mousse). I figured with a name that mentioned "matte" it was worth a try! I love how this product has a whipped consistency and is lighter than your traditional liquid foundation. I apply it using a foundation brush (though you can use your fingers if you prefer) and have been so pleased with the finish! It isn't too heavy or cakey and gives me great coverage with minimal mid-day shine. I don't think it's possible to go a whole day without some shine in the t-zone but I do notice a significant difference when I use this product vs. other foundation products. Great, flawless, matte finish!


3. Maybelline Dream Nude Foam
Our most lightweight foundation for 100% nude perfection.
Lightweight foam for a flawless finish. Ideal for normal skin.

Dream Nude Airfoam - Pack Shot

When I was at Target a few days ago (Target is SO my downfall) I also noticed that Maybelline is featuring a new product called Dream Nude Foam. I was really intrigued by the foam factor and the lightness of the product. I was anxious to see how it matched up against tinted moisturizer. The packaging is a little different in that it is a small metal can that you actually shake up (kind of like spray paint - it even makes that sound!). The foam is very similar to what you get when using hair mousse but it is tinted. When I use this I just shake it up, put some on my foundation brush and apply it with swirling motions around my face. I am really happy with how seamlessly the product blends while still providing light-medium coverage. It disappears easily into the skin and gives you that necessary coverage without being overly heavy. So when I am looking for lighter coverage this is a great secondary option that provides a bit more moisture without being heavy. It is a little more awkward for me to apply but overall I am pleased with the finish. It isn't as mattifying as the Dream Matte Mousse so I have to blot my t-zone at lunch time, but it still is a nice, light alternative to regular foundation.


4. E.L.F. Mineral Eyeshadow Primer
This gentle and completely sheer Eyeshadow Primer has key vitamins A, C and E to help prevent aging and moisturizes the skin. The formula glides on easily and disappears instantly to create longer-lasting, crease-proof eyeshadow.

Sheer Primer

I have tried a number of different eye shadow primer's and can honestly say I am just as pleased with the E.L.F. $3 option as I am the Too Faced Shadow Insurance Primer. I know people might think I'm crazy for saying that but I am honestly just as pleased when I use either product. And truthfully I like using the E.L.F. product because it comes with a wand so to me it is even easier to apply a quick dab to each eye! It prevents creasing and gives your shadow great staying power. If you're looking for an easy, inexpensive eye shadow primer that will give you great results, this is the way to go!


5. Maybelline "The Falsies"
False lash glam in a tube, instantly! 300% more visible lashes corner-to-corner, no gaps.

Volum Express The Falsies Washable Mascara - Pack Shot

Okay 2 things I need to say quickly: no this isn't a Maybelline love-fest and please remember, mascara is SO subjective!!! I really think everyone wants something different for mascara. I've tried many that people love and rave about and have hated them. Just this week I gave my mom one of the MAC mascaras I purchased and while I wasn't pleased it was exactly what she was looking for in a mascara!

That being said, Maybelline's "The Falsies" is my go to mascara when I am going for a dramatic look. I really think a lot of this comes down to the formula of the mascara and more importantly the "spoon brush." The product is a little wet so I have to make sure to let it dry (and not sneeze after I've applied it, haha!) but it really gives me that full, dramatic lash look I want for a night on the town! I should say, it is not the same as actually wearing false lashes (as the add campaign will have you believe) but the spoon design of the brush really gives me the ability to apply multiple, thickening coats that build up to my ideal finish. Love this stuff!!!


So these are just a few of my main drug-store must haves! Do you have any drugstore products that you depend on? Please share below! I'm always game for trying a new product :)

~Christi


Like this post?
Pin It

Wednesday, January 18, 2012

Low Calorie Cornbread Muffins

It's now is week 3 of counting our calories and it amazes me how easy it can be to take normal high calorie foods and replace them with a low calorie option. I made chili last night for dinner and I was craving some good ol' fashion cornbread muffins to go along with it. Normal cornbread muffins usually call for a half of stick of butter, lots of sugar, and maybe some honey. Though all of those items I love to death, they sure pack on the calories! One normal sized cornbread muffin can be almost 250 calories!! (Don't beleive me check out this highly rated recipe for Cornbread Muffins I.) That being said, I decided to redo my recipe and try to make a good and healthy alternative.

1 cup canned (no salt added) cream-style corn
2/3 cup all-purpose flour
1/2 cup cornmeal
1/2 cup liquid egg substitute (I used the Egg Beaters)
1/2 cup fat-free plain Greek yogurt
1-2 packets of No Calorie Sweetener
1 1/2 tsp. baking powder
1/4 tsp. salt
1/4 cup diced jalapenos (optional)

1. Preheat oven to 375 degrees.
2. Mix all ingredients in a bowl and stir. (I only used 1 packet of sweetener, it's up to you.)
3. Either spray a 12-cup muffin pan, or line it with muffin liners. (I LOVE my silicone muffin liners!)
4. Fill each baking cup evenly.
5. Bake in the oven for 20-25 minutes until muffins are golden brown and firm in the center.
6. Enjoy one, two, or three! (As THREE are the same calories as ONE normal recipe one!)

The Skinny: Serves 12 @ 71 calories each

Here is total nutrition information courtesy of CalorieCount.com
(I don't know if I have said this, but I LOVE their recipe analyzer!)

Tuesday, January 17, 2012

Random Thoughts: 25 Things


source

Inspired by my friend Greta's blog post, 25 Things, I too decided to write a random list of 25 things that are swimming around my head. She is always so creative with her posts! I hope you enjoy the randomness and please don't think I am too strange. I am hoping it turns out to be amazing therapy to get some if these thoughts out of my head.

1. I am tired...

2. Amazed my son is still sleeping at 7:00am...that's 12 hours people.

3. I love coffee, I probably won't be tired after I have this coffee.

4. I love that my dog is vocal, she just barked at me to let her back inside. I miss she doesn't sing as much as she use to.

5. I love snow. It finally snowed here, only the 3rd time this winter. I miss it. If I didn't like snow I would still be living in Dallas.

6. I need to be working right now. I have a big project I have been working for the last week and I should be doing it now.

7. I miss food.....Um, I mean high calorie food. Counting calories isn't all the fun people say it is.

8. I need to clean off my desk, I can't see the top of it thanks to #6.

9. I really love coffee. I started grinding my own beans in the morning, but my grinder makes a terrible mess and my husband refuses to clean the counter anymore as he is not a coffee drinker.

10. I love that I have a husband that helps me clean.

11. I spent most of my day singing songs from shows my son watches like, "It's a super story answer, with Super Why!" or "Baby, baby, baby signing time." It's annoying.

12. I am sore, thanks to Total Insanity. Good news is I saw a hint of a line on my abs yesterday.

13. The little man is still sleeping, I blame teething. Oh, and that he got up at 4am and drank a whole sippy cup of milk.

14. I don't like it that my husband works random shifts all the time. I would rather have him do a normal shift every day.

15. I shouldn't complain about my husband's job, it's a good place to work. They can't help it they have to stay open 24/7/365....people get sick.

16. I fear going to my husband's work, not in the fun usual way of bringing cookies. (He works in the ER.)

17. I feel guilty for not attending church once this year. I blame my husband's schedule and the fact that if I went solo I would spend most of my time outside with my crazy kiddo.

18. I love my crazy kiddo, wish he would wake up. He calls any food that we are eating "Hot" and once you put on your coat he automatically says "Bye".

19. Propane heat is super expensive.

20. I hate this house we are in. It's old, dirty, dated, creaks, and I can't wait to build our new one.

21. I love this house we are in because we can spill, dent, drop, and destroy things and I don't feel bad about it.

22. I fear we might end up living in this house longer then our 3 year plan. I think we might like not having a house payment for a while.

23. I am going to miss my puppy when she is gone. She is 9 years old now and getting so old.

24. I never talk on the phone anymore. That is all I use to do. I am missing some old friends that I desperately need to call.

25. My son is up, I am really excited to see him this morning! Gotta go!


Saturday, January 14, 2012

DIY Build Your Own Wine Rack

A couple months ago I blogged about my Shoe Storage Bench that I built out of pallets and mentioned at the end of the post that I would be starting a new project, building a wine rack.


Well I am happy to say the wine rack is finished! It was a pretty easy project and I think any beginning builder can build this rack.

The wine rack features 14 shelves and holds 98+ bottles.

Here is my little DIY on how you can make this same wine rack.

You will need the following cuts (And there are lots & lots of cuts!):
Qty 112 = 1"x1"x12" (Bottle separators)
Qty 28 = 1"x3"x12" (Sides of the wine rack shelf)
Qty 28 = 1"x2"x32" (Front & back of the wine rack shelf)

For the main support for the shelves you will need:
Qty 4- 1"x3"x84"
Shims to level out the wine rack
Before you start this project please make a note that I drilled holes before placing all screws. I didn't want any of the wood to split, so drilling holes will prevent that. Every time you read "screw them together" it really means "drill a hole for the screw and then screw them together."

To start the rack, build the frame of the shelves. Take two 1"x3"x12" boards and screw them to two 1"x2"x32" boards. You should end up with a rectangle frame like below. (Note: There are two screws in each corner. Each shelf should have 8 screws in it for stability.) Now repeat this step 13 more times!
You will end up with 14 shelves that look like this:
Next are the bottle separators. There are 112 of them so be ready! There are two options with the wine bottle separators:

Option 1- Uniform Shelves
If you would like to have your wine rack be uniform and the shelves to hold the exact same size/amount of bottles, you will need to space the bottle separators 3 inches apart. (You will only get 98 bottle spaces this way.)

Option 2- Varying Shelves
I decided that I wanted this wine rack to hold our skinny bottles (which we have bottle mead in) and also the larger 1.5 bottles. I took my top two racks and place the separators 2 inches apart. This allowed me the two racks to hold 18 skinny bottles. On the bottom two racks, I place the separators 3.5 inches apart, allowing me to hold 12 of the larger 1.5 liter bottles. Leaving 10 racks, with separators 3 inches apart, to hold 7 bottle each. (You will be able to hold 100 bottles this way.)

The choice is up to you, but my examples below show what I did on the majority of my wine racks, which means 3 inches apart, having each shelf hold 7 bottles of wine.

Start out by screwing the first wine separator to the shelf frame. The separator should start on the inside of the 1"x3"x12" board.
Now to make this step go faster, I cut a 3 inch board to be a spacer between my separators.
I also made a stick that went the width of the shelf showing where each separator should be placed.
Eventually you will have each of the separators installed and ready to go.
I worked very hard on putting these rack together and it became an evening project to watch tv, drink a glass of wine, and assemble a few racks each night. Doesn't that sound wonderful? Have a glass of wine while building a wine rack? Well, it sounds great until that point where you accidentally drop your drill on your thumb!So kids, the lesson we learned is power tools and alcohol do not mix! By the way, I smashed my thumb almost two months ago and the picture above is what it looks like now. I would have showed you the before, but it was a pretty bloody mess so I thought I would spare you. Maybe by summer the bruise will grow out!

Other than the injury, I finally finished all 14 shelves.
After all the shelves were completed, I decided to stain them all a dark cherry that pretty matches all my other furniture in the house.

Now comes the difficult part, assembling the wine rack. You will most likely require a helper, and my husband was so kind to help me out. We laid the wine rack on it's side and placed the 1"x3"x72" boards on the backside of the racks. (Take note, we started with the back first incase we made any errors while screwing it together.) We decided each rack needed to be 6 inches apart and began screwing the racks in place.

The screws should run through the 1"x3"x72" board into the bottom of the shelf (the 1"x3"x12" board.) Once all are attached on the back, flip it over and start with the front. It is very important when you are assembling the rack that you make sure all shelves are attached level both front and back and side to side. This will prevent any bottles from falling off the rack.
We decided to put the rack up in our utility room, out of the way of a certain little boy that might want to try climbing it. Wherever you decided to place the rack, your floor might not be level so use shims to level out the rack. Again, this will to prevent bottles from falling off the rack and the wine rack from falling over. In addition to the shims, we also screwed the rack to the wall to prevent it from falling over. I am pretty sure 100 bottles of wine would REALLY hurt if it fell on someone!
The rack is finished and we LOVE it! Though we haven't quite filled it up, we love the extra wine storage it provides. (If you are wondering how we acquired so many bottles, we make our own wine.)
Some of the shelves are holding empty bottles, but hopefully we get a new batch of wine brewing soon so we can replace them with full bottles.
I hope this DIY project inspired some of you new to woodworking to get out there and try it for yourself. Like I say a lot in this blog-- If I can do it, you can do it! Happy building!

Tuesday, January 10, 2012

Healthy Tofu Fried Rice


1 cup uncooked brown rice
1 tablespoon vegetable oil
18 ounces tofu, sliced into about 1" x 1/2" pieces
1 pinch salt
1 tablespoon of sesame oil
3/4 cup sliced celery
1 cup carrots, diced
1 small onion, diced
1 red pepper, diced 1 " pieces
1 cup sliced mushrooms
1 teaspoon of ginger paste
1/4 cup light soy sauce
1 tbsp molasses

1. In rice cooker, cook rice according to package directions.
2. While rice cooks, heat 1 tablespoon of vegetable oil in a large nonstick skillet over medium-high heat.
3. Add tofu; cook 4 minutes or until lightly browned. Salt and pepper if desired.
4. Remove tofu from pan and keep warm.
5. In same pan used for tofu, add sesame oil, carrots, and celery and cook for about 5 minutes.
6. Once carrots and celery are tender, add onions and red bell pepper and saute for about 4 more minutes.
7. Add in mushrooms and green onions and cook for a few more minutes until green onions are tender.
8. In a small bowl mix ginger and soy sauce.
9. When vegetables are all cooked, add in rice and soy sauce mixture. Combine until warm.
10. When the rice mixture is warm, add in the molasses until slightly sweet. We only used 1
tablespoon.

Enjoy!

Serves 4 @ 381 calories

Sunday, January 8, 2012

Sophistication Sundays - OBSESSION: Revlon Lip Butters

My Sophistication Muse, Audrey Hepburn
Sophistication Sunday revolves around my favorite beauty finds, techniques, fashion trends and anything else "pretty" that catches my eye. I look forward to sharing these ideas with you and hope to hear your suggestions and feedback as well! I am no expert at beauty or fashion by any means but perhaps that will make my thoughts more relatable. Simply put, I'm just a girly-girl navigating my way through the fabulous finds I come across.
...

The latest makeup craze (next to Urban Decay's Naked 2 Palette) is definitely Revlon's new line of lip butters. I have never been a huge Revlon fan myself - I was pretty much just apathetic in regards to the brand. However, with all the buzz about this new lip butter line I just had to check it out. And wow I am so glad I did! I am now completely and utterly obsessed!!! Let's just say it's caused me to take a second look at the brand as a whole.


The product is described as, "Buttery balm with beautiful shiny color to give you baby soft, healthy glowing lips." This is a simple description that really pales in comparison to the actual product. These are not tinted balms like what we've recently seen from Burt's Bees and Maybelline. Instead they are more like creamy, ultra-moisturizing lip sticks. They have build-able color so you can control the intensity of the shade and in my opinion the staying power is fantastic. No the staying power isn't that of Covergirl Outlast All-Day Lip Color or MAC Pro Longwear Lipcolour. But from my experience the color is still present and strong on the lips even after breakfast and my morning coffee.


This product has become such a craze that it can be difficult to find even though it is stocked at all major drugstores and big box stores. I picked up my first two shades at Target and bought the others on ULTA since they were running a great promotion for the product.

I believe there are 20 shades in all and I am happy to report that Revlon is said to be keeping this as a permanent product in their line. Hooray!

So here is an overview of the shades I have and my opinion on their color, feel and staying-power.
Revlon ColorBurst Lip Butter, Candy Apple
"Candy Apple"

I purchased this beautiful red shade around Christmas time and was so, so PLEASED with the product! I am a huge fan of red lipstick but have never found a type that I was truly pleased with. If I wore regular red lipstick it would come off right away and always had a drying effect. If I tried a long wear type of product the red would eventually flake off and make the mid-day reapplication a terrible process because of the uneven texture it left on my lips.

When I first tried this shade I was pleased to see I could apply a sheer coat or easily amp up the color & add lip liner for a classic red lip. The color is strong and the feel is incredibly moisturizing with a shiny finish. I want to be able to rub my lips together and without stickiness or a rough feeling. I was so pleasantly surprised by the overall look and feel and even more thrilled when I checked the color after my typical breakfast and some time had elapsed. The color had faded a bit but I still had a strong wash of red on my lips. I applied another swipe of the product and was easily back to square one. Perfection! A++


strong red lip


Continuing with our red obsession, I am also completely enamored with the shade "Red Velvet." It provides a deeper, darker red that is fantastic for fall and winter lips. Again, the color is buildable and I find I like the shade best if I do a little tissue blot after I've applied it. Beautiful color!
A+


Among many ladies in the beauty blogger world this shade seems to be a favorite. Sadly I was, and continue to be, disappointed with it. Don't get me wrong, I think the color is fantastic and can compliment just about everyone. But there is glitter in this shade and so I can't give it as high of a rating as the others. I noticed this right away but tried to wear it again a few times just to see if I would get used to it. Unfortunately I just couldn't stand the gritty feeling. I rubbed my lips together and would swear I could feel the individual glitter pieces in the product. It also created that dreaded line on my lips that comes from some lip products; you know where you have to take a wet washcloth and go over your lips? It seemed like it sucked moisture out instead of locking it in. So to recap, while I LOVE LOVE LOVE the color - a pinky-peach with golden sheen - I am just not comfortable with the feel of the product. Boo.
B-


In my quest to find a shade that encompassed the feel of the first to but in the realm of a "natural pink" I purchased pink truffle. The color is good but for me a little to close to my natural lip color. Still, the feel is perfect and moisturizing and a great option for go to lip butter to keep in my purse. I don't feel like the picture above is truly representative of the color as it is more of a muted pink with brown undertones. This picture looks a little too red.
A-


Revlon ColorBurst Lip Butter, Strawberry Shortcake
"Strawberry Shortcake"

I had a really hard time trying to decide what pink shade was the best shade to try. Pink truffle wasn't exactly what I wanted and other shades in the line were too pink for my coloring. I tend to look better in coral pinks because I have naturally red/auburn hair and add highlights (trust me, it's unique and can be tough to work with!). I tend to break many style rules for redheads but pink color on or around my face is very tricky. I decided to give strawberry shortcake a try and am pleased to say the feel was just as fantastic as the others that I loved. In the dead of winter right now it isn't quite right but I know that come summer when I work on my tan it will be perfect. Gotta love a good pink lip! Also, if you are someone who loves different shades of pink they have a ton of others in the line that you will love including a hot, hot pink and a cool pink as well. Lots of pink options, really!
A-


Finally we come to another one of my favorites in the line, "Creme Brulee." I have long-searched for the perfect nude lip to accompany a smokey eye look. I often find lip glosses and lip sticks that look nice in the package but are either too strong (and make me look washed out) or create that dreaded "line" I talked about with the Peach Parfait shade. This is the PERFECT combination of color and shine for a nude lip. The feel again is just amazing and the color is nude enough without completely washing out my lips. I am in love with it and am so happy to have found a shade that gives me that look all in one product instead of applying a lip stick and following up with a different lip gloss to try and balance it out. A++


Will you try Revlon lip butters?
Or have you already purchased one?
What's your favorite shade?


~Christi

Thursday, January 5, 2012

Best Low Calorie Snacks

I have said it before and I will say it again, I feel counting calories is pretty much the only way to lose weight. Now I am not a nutritionist, but I have lost all my college weight and baby weight this way (over 25 pounds each time) and I feel that this method really works! I know there are a lot of shakes, protein diets, and cleanses that people swear by, but I just can't see doing a diet that I can't keep up somewhat on a regular basis. Granted, I have never tried any of those other diets, but count calories just makes sense to me. As Dr. Laura always says, "More more, eat less."

With that said, I have 10 pounds to lose in this new year, thanks to my overindulgent eating over the holidays and the messed up scale (see post Things To Get Done In The New Year.)

In addition to my beloved MyFitnessPal,

I couldn't count calories without my list of low calorie snacky foods that help me make it through those moments of hunger/boredom.

Here is my list for the Best Low Calorie Snacks that will help you power through to your weight loss goals:
1. String Cheese
source
At around 80 calories per serving, string cheese is one of those foods that are great to eat on the go! It also has the benefits of adding protein and calcium to your diet.

2. Greek Yogurtsource

You can ask anyone, I love my yogurt. When I found out about Greek Yogurt, my love only grew stronger! This yogurt usually has about 15 to 20 grams of protein which is twice as much as regular yogurt. At around 140 calories per serving you can't go wrong!

3. Oatmeal

source

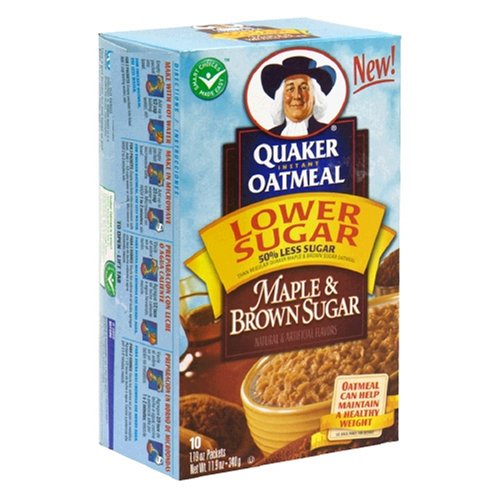
This is a little unconventional as healthy snack foods, but on days I am craving something sweet this seems to hit the spot. It only has 120 calories, usually fills me up for a while, and provides lots of vitamin A, fiber, and iron.

4. Air-Popped Popcorn
source

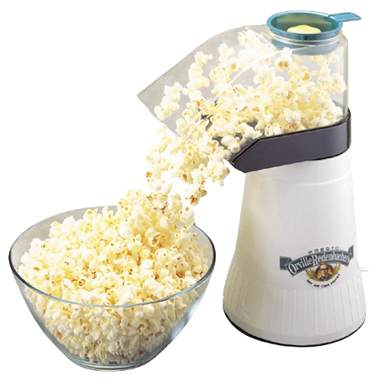
I love air-popped popcorn! This has become an almost nightly snack for me. The plain taste takes some time to get use to, but when you find out you can eat 4 cups of this at only 124 calories, you might want to give it a try.

5. Dove Dark Chocolate Miniatures
source

This too has become a nightly snack for me. I love chocolate and I usually eat 2-3 pieces of this chocolate a night. It seems just to be enough to stop me from running up to Dairy Queen for a blizzard. If you savor each piece you will be amazed at how it will curb your sweet tooth. Eating 3 pieces of this chocolate is only 126 calories.

6. Green Tea
source

There are moments throughout the day where you find that just want to eat out of boredom. I find them mostly when I am sitting on the couch watching TV. I have solved this problem by drinking a cup of green tea. Not only is it calorie free but it's also a calming part of my day to enjoy a nice cup of green tea. I know some people out there think it tastes bitter, but I ONLY buy the Bigelow Decaffeinated Green Tea because I have found many other brands are bitter. (An added bonus I have read lately is that green tea is suppose to help with fat loss!)

7. Cheerios
source

This really started when I was pregnant and I don't know why I never thought of it before. If I workout really hard during the day I have a problem of waking up in the middle of the night hungry. I have solved this problem by eating a bowl of cheerios with skim milk right before bed. It only has 150 calories (if measured to what it says on the box) and it seems to just help me make it through the night. Also, I don't seem to wake up as hungry when I eat before bed.

8. Cottage Cheese
source

My husband hates this stuff, but I love it. I am the only one eating it in the house, so when wanting some quick snack I grab a spoon and eat out of the container. I only buy the low-fat kind just to make sure I am not consuming large amount of calories. Eating 1/2 a cup is only 90 calories!

9. Hot Chocolate
source

On those days you are really craving chocolate, I love to enjoy a nice cup of hot chocolate. It's sweet, warm and just enjoyable to drink. I don't think I have ever seen someone drink hot chocolate angry and how could you at only 90 calories a cup!

10. Peanut Butter
source

I believe peanut butter can be both your friend and foe while dieting. Eating too much adds up the calories but eating a little can give you a little extra energy and keep you full for hours. I like to top a piece of 40 calorie whole wheat bread with 1 tablespoon of peanut butter, which ends up being about 140 calories.

That is my major snack food list while I work on losing this extra weight. Do you have any low calorie snack foods that you live by? If so, I would love to hear about them. I am always up for new ideas when counting calories. Please feel free to share below in the comments!


Like This?- Pin It!

 
Copyright 2009 between3sisters