Tuesday, September 25, 2012

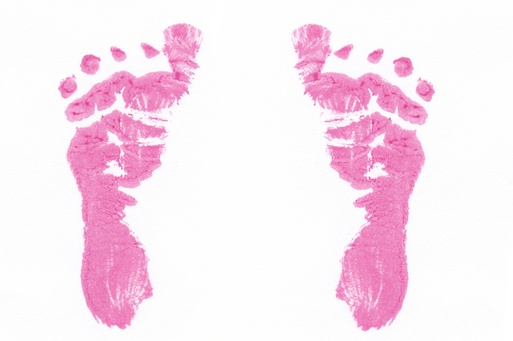
Baby 2.0: Please Welcome Remy

After 39 weeks of anticipation, I am excited to finally introduce to you:

Remy Leola

She was born a few days ago and weighted a whopping 6 pounds 8 ounces. She has the blackest, thickest hair I have ever seen on a baby.

Her older brother is somewhat fascinated by her. (Here he is counting her toes.)
For the most part he still doesn't quite understand what to do with her, but he is adjusting fine. 

I have to say, having a kid the second time around appears to be so much easier then the first time. (Read the blog, Please Welcome Aiden.) I so far have seemed to handle the lack of sleep better and nursing doesn't appear to be quite as challenging as the first time. I luckily have the help of my in-laws who are staying with me for two weeks, so the adjustment has been made so much easier by them! 

With that said, the normal duties of cooking, cleaning, and blogging will again be put on the back burner until I have adjusted to being mother of two. I look forward to the next few weeks of quiet times holding her and not so quiet times while playing with her older brother. 


Like this post?

Wednesday, September 19, 2012

Auntie Anticipation

Tomorrow is Beth's big day!  My new niece should arrive around 12:00 p.m. this September 20th, 2012.
Obviously I cannot wait to meet her! 


There is something really special about being an Aunt.  It is an amazing thing to see your sibling become a parent and it's even more amazing to watch each child grow.  


Niece Addison


When my nephews were still itty bitty :)


Hubby & I with soon-to-be big brother :)


Every time a new niece or nephew is born it changes everything.  Of course life changes for the parents but for the family as a whole, it is also never the same.  Many will probably look at each birth and think, oh it's just another kid!  But honestly, the family dynamic will be entirely different once that beautiful baby is born.  I often look back on the birth of my other nephews and niece and it is hard for me to imagine life without them.  Even though they've only been with us for about a decade now, my life, and our lives, are never the same.


Christmas 2 years ago...


I cannot wait to meet this sweet baby girl and to watch her grow!  Please keep Beth and the baby in your prayers tomorrow.  

p.s. I'm anxious to see how her son likes being a big brother :)  I'm sure he'll be great!  


~Christi

Tuesday, September 18, 2012

The Joys of Toddlerhood: The Big Boy Chore Chart

Well, my son is now almost 2 years old.....to be exact 23 months. He seems to be turning into even more of a big boy every day and I wonder where my baby has gone!?!?

He is now big enough to do lots of fun activities with him, that before he didn't quite understand such as:

Making Cookies


Building Bridges with Legos 
(with help from Daddy)

Painting

Picking Apples

Eating Cereal & Milk 

In addition to all the fun activities, he has started helping me with chores around the house. I thought it would be great to start a chore chart, so I designed the one below.

You can click here for links to the word documents:
 (The font on the list will not be the same as mine, but you can customize the chart as needed with your own list and font.)

I filled the chart with "chores" that he helps out with now AND some activities he doesn't enjoy....like clipping his finger nails. Each time he completes a task, he will get to put a sticker on that spot. What happens when he fills it up with stickers??? Well probably nothing, the sticker is fun enough right now! 

Maybe some day in the future we will take him out for a treat or some other reward, but for now he just likes to see the smiley faces. He is still grasping the concept of the chart (he tried to eat a sticker today) but each day it is something fun he can look forward to that helps us out around the house.


Like this post?

Monday, September 17, 2012

Make Ahead Meals: Dump Chicken Meals

I am starting a series of blogs for Make Ahead Meals that I am preparing before Baby 2.0 arrives. Every night when I make dinner, I am doubling the recipe and putting the second in the freezer. I am hoping that the prepared meals will help on those totally exhausted days when cooking sounds like no fun. I am hoping many of the meals I will be preparing will be somewhat healthy and low calorie, but I know there will be some meals mixed in that aren't. To prepare for the freezer meals, I purchased some slow cooker liners (for the crockpot meals), gallon freezer bags (for the freezer skillet meals), and Aluminum Foil Steam Table Pans with matching lids (for the freezer casseroles).

Another sale at the local store, this time with boneless, skinless chicken! Perfect for some dump chicken meals. Now if you have never heard of "dump chicken" let me define it for you:

Dump Chicken { ˈdəmp  ˈchi-kən }:
 The process of combining many ingredients with chicken and then pouring (or "dumping") them in a baking carafe to make a meal. 

In other words-- very easy meals made with chicken and some other random ingredients. I made three "dump chicken" meals and I thought I would share the recipes. 

All of these meals I plan to cook in the crockpot (though you could also bake them in the oven), so I put them all in a slow cooker liner bag. I separated three pounds of boneless, skinless chicken breasts into three slow cooker liner bags. 
And then I prepared myself to begin dumping ingredients.

The first recipe:
Cranberry Chicken
 You will need: 
1 tablespoon Soy Sauce
1 can Cranberry Sauce
1/4 cup Orange Juice Concentrate
1/8 teaspoon Cinnamon

Mix all the ingredients in a bowl. 


And "dump" on your chicken in the slow cooker liner:  

Seal with a twist tie: 
I plan on serving this meal with Quinoa on the side and it should be pretty tasty!

Pretty tough, right? Only two more recipes to go!

The next recipe is: 
 Apricot  BBQ Chicken
You will need:
3/4 cup Ketchup
3/4 cup Apricot Preserves
1/4 cup Apple Cider Vinegar
1 tbs Worcestershire Sauce
2 teaspoons Chili Powder
1/8 teaspoon Salt
3  teaspoon brown sugar


Again, mix all the ingredients in a bowl: 

And pour over a different bag of chicken: 

Twist with a twisty tie: 
I plan on serving this meal either as whole chicken or pulling the meat into sandwiches. I think it would be great with a side of corn bread. 

Ok, can you handle one more??? I know these recipes are tough! This is the last one: 
Sticky Chicky
You will need: 

2 tablespoons Oil
2 tablespoon Soy Sauce
3/4 cup Peanut Butter
3 tablespoons Ketchup
1  teaspoon of Salt

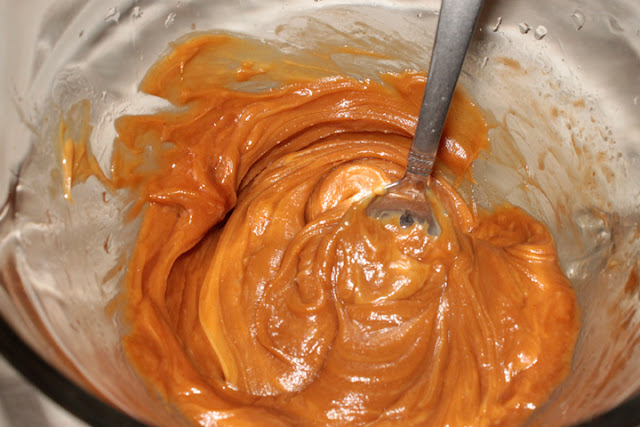
Mix all ingredients in a bowl together: 


Pour over final bag of chicken: 

And seal again with a twisty tie: 
I plan on serving this meal over some cooked brown rice! Super easy!

Now because all of these chickens are in slow cooker liners, which are somewhat thin, I decided to put each bag into a freezer bag to prevent any freezer burn. 

You can label them each
"Thaw overnight. Cook in slow cooker for 4-6 hours"
or 
"Thaw overnight. Bake in oven for 45 minutes or until chicken reaches 165 degrees."


These "dump chicken" meals are so easy to put together and always turn out great! 

Meals to date:
1 x Cranberry Chicken
1 x Apricot BBQ Chicken
1 x Sticky Chicky

I have a little confession to make-- I have made a ton of meals so far, but honestly not had the time to blog about them all. I actually go into the hospital to have the baby in 4 days, so I doubt that I will be able to blog about the rest of them in time, so I will just keep posting these until I have them all up! Thanks for understanding! 


Like this post?

Friday, September 14, 2012

DIY: Faking A Painting

Have you ever taken a picture or seen a print that you wished you could turn into a painting? This happens to me all the time, as I tend to not like all the standard paintings you find at most stores and I refuse to pay a lot of money for artwork.  A few years ago, I came up with a method of how to fake a painting. What I mean by "faking a painting" is taking an actual image, print it on a flat piece of media, and applying a coat over the top of it so it looks like a painting. To the untrained eye, it looks like a painting. 

For example, I did this technique for all of my paintings in my old living room:

Even though they might look like prints in this picture, up close they look like a painting. I have had several people ask me if I painted them. 

With that said, I was needing a few paintings in my bathroom I am remodeling and I couldn't find anything I liked in the size I needed. (A few months back, I posted how I hated our main bathroom and was in the process of trying to make it not so 1970s.) I thought I would write a little DIY on how you too can fake a painting. 

To start, you need to determine what image you are wanting to turn into a painting and apply it to a canvas. You can go several routes with this. There are many printers out there who will print directly to canvas material or you could have your image printed on decal and you could apply it yourself. The paintings in my living room were printed directly to the canvas. (Or course I work for a printing company, so it cost me nothing. You can email me and I will give you their information for printing.) 

 In the case of the paintings for my bathroom, I started with two 10-inch blank canvases and a wall decal that I found at Hobby Lobby. 


I trimmed out the images I wanted from the wall decals and applied them to the canvases. 

They weren't quite large enough for the canvas, but I will make it work. 

I took brown acrylic paint and painted a brown border around the outside of the decals to fill up the canvas. 

I ended up with two canvases that looked like this:

Next, you will need some Gloss Glaze. You can find this in the painting section of any craft store. It's clear and will give the effect of brush strokes on the painting. 

Apply the Gloss Glaze using a few different types of brushes. Paint the glaze on as if you actually painted the image. Which means, run strokes where there are different colors and use different motions, dabbing, and other painting strokes. 

Allow the glaze to dry and you should be left with two canvas prints that do a great job in being "faked" to look like a painting. (Sorry it is such a bad picture, the lighting was super bad in the room at the time. When you see what I will be using the canvases for, it's a better image on how they look like a painting.)

Usually, I wouldn't do the border, but these prints/fake paintings will be hinged to my latest storage project. Stay tuned to find out! 


Like this post?

Wednesday, September 12, 2012

Make Ahead Meals: Quesadilla Casserole

I am starting a series of blogs for Make Ahead Meals that I am preparing before Baby 2.0 arrives. Every night when I make dinner, I am doubling the recipe and putting the second in the freezer. I am hoping that the prepared meals will help on those totally exhausted days when cooking sounds like no fun. I am hoping many of the meals I will be preparing will be somewhat healthy and low calorie, but I know there will be some meals mixed in that aren't. To prepare for the freezer meals, I purchased some slow cooker liners (for the crockpot meals), gallon freezer bags (for the freezer skillet meals), and Aluminum Foil Steam Table Pans with matching lids (for the freezer casseroles).

First of all, I like to buy meat in bulk when it's on sale. When it comes to ground beef, I usually buy large quantity and brown it all at once. Usually I will end up with a giant container of browned ground beef in my freezer like this:

I was on the hunt for another ground beef recipe and I came across this recipe for Joyful Momma's Kitchen for Quesadilla Casserole (Freezer Meal) and thought it sounded like a pretty easy and yummy meal to add to my deep freezer. (You can check out the full recipe here.)


To start this meal, dice the onion and caramelize over medium heat. 

Next I assembled the ingredients to make the inside of the casserole: chili powder, ground cumin, dried minced garlic, oregano, crushed red pepper, 16 oz tomato sauce, 1 can of black beans, 1 can of whole kernel corn, and 1 can of green chilies. 

 I added the ground beef to the cooked onions.

Then I mixed in all the ingredients and let simmer for 20 minutes.

To start the casserole, spray oil spray on the bottom of your foil pan and then spread 1/2 cup of the beef mixture on bottom. Top with 3 of the tortillas, overlapping as needed.

Layer with 1/2 of the remaining beef mixture and 1/2 of the cheese.

Repeat with remaining tortillas.

Top with remaining beef mixture and cheese.

Top the pan with foil and cover with pan lid. Label with the following instructions:
- Thaw and bake uncovered at 350 degrees for 15-20 minutes or until heated through. 
Let stand 5 minutes before serving. 

And just if you are wondering, here is the calories count on this meal. 


Not the lowest calorie meal, but I have a feeling it might end up feeling more like 10 people instead of 8.

Meals to date:
2 x Spaghetti and Meatballs (really just frozen meatball)
1 x Quesadilla Casserole


Like this post?

Like This?- Pin It!

 
Copyright 2009 between3sisters