

I HATE wet socks!
I began looking online for a shoe storage bench. I found something like this for $112.

buy it here

I fell in love! It would be so nice to have a coat rack, some storage, and a shoe bench in my mud room!
However, I know my husband, and he would probably say that we really don't need it for that price. So one day, I decided that I could build my own. As of late, I have been obsessed with wooden pallet furniture. I thought that some pallets would make a great shoe storage bench....and they did! So here are the directions if you would like to build your own storage bench.

 Each shelf also needs some center support boards, so I cut two center supports for each shelf and two end supports for each shelves.
 Next, screw your center supports into place:
 Starting with the bottom shelf, screw the two 2"x3"x18" boards to the tops of each of the edges. (Note: If you plan on finishing the bench, this is the part I wish I would have sanded the bench. It was very hard to sand the bench once all the shelves were put together.)
 Now, stack your next pallet shelf on the bottom. Use the pallet overhang to screw it in place to the shelf below.
 You should have something like this:
 Place your 2"x4"x18" side piece on the pallet overhang and then put the top 2"x3"x18" piece on the top of the ends. You are using your 2"x3"x18" to hold the side piece in place. You need to screw down the top piece (2"x3"x18") to hold the side piece in and to attach to the shelf. (Note: I drilled a hole and then screwed in the screw. I just found it easier and I didn't want to split the wood. I wasn't sure how the pallet would would hold up to just drilling a screw in.)
 Repeat the process. I used very long screws because I wanted to make sure that the screw went all the way through the shelf, into the side piece of the shelf below.
 You should end up with something like the picture below. (You might want to use clamps if your boards are bowed a little.)
 Now it's time for the top. I purchased a 1"x6" pine board for my top. I didn't want anyone snagging their clothes on the rough pallet wood, so I thought the top should be smooth. Measure the width of your bench, in my case it was 48" (including the overhangs on the side), and cut your board into 3 pieces.
 Place your boards across top of the bench (there will be gaps in between them) and mark your drill marks. I decided to nail on the top, to add sort of a rustic feel. I had some large roofing nails that I liked the look of, so I used them. I did drill holes part of the way before putting the nails in so I was easier for me and I didn't dent the wood.
 You should now have a bench that looks something like this! Now you have to flip it over to add the wheels.
 I added wheels to mine, to make it easier to cleaning under.
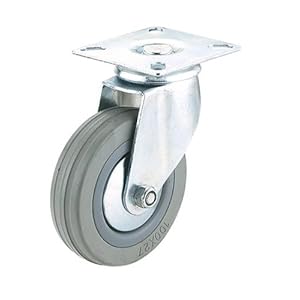 I bought these casters from Amazon.com and they are suppose to hold enough weight for the bench. I am proud to say that this is the only step I had to ask my husband for help on. I can't lift the bench to flip it over by myself!


 Finally, my mud room coat and shoe storage is complete!
 We have had several people over since building it and I have actually had to convince people that this bench was built from pallets. It's a great way to use up some old pallets and add less to our dumps. Plus, it's cheap and easy!
However, I know my husband, and he would probably say that we really don't need it for that price. So one day, I decided that I could build my own. As of late, I have been obsessed with wooden pallet furniture. I thought that some pallets would make a great shoe storage bench....and they did! So here are the directions if you would like to build your own storage bench.
Start with two pallets. Try to get the exact same pallets and some pallets that are in fairly good condition. Also, try to find pallets that use 2"x4" construction for the middle board. The bench finishes at 48"x18".
You will need:
(1) - 1"x6"x 12' long cut into 48" lengths (The top, 3 cuts)
(1) - 2"x4"x 6' long ripped down the middle cut into 18" lengths (Center supports- 8 cuts)
(1) - 2"x4"x 12' cut into 18" lengths (Side supports- 8 cuts)
(1) - 2"x4"x 12' milled down to 3" wide (optional) cut into 18" lengths (Bottom Side supports- 8 cuts)
Circular Saw (This is a great one here)
Drill (Seriously the Dewalt Hammer Drill is my fav!)
Lots of screws
Hammer
Hammer
Chisel
4 casters
4 casters
Turn the pallets over and remove the bottom.
 I did this with a chisel and hammer. I just chiseled around the nails and then used the hammer to pull them out. You want to remove the bottom to extend the spaces between shelves for bigger shoes.
 Your pallets should look something like this:
 Next, cut them both in half the width way. Make sure you measure so they are all even pieces. Measure twice!
 Now, most likely, your circular saw won't cut all the way through the thickness of the wood, so I used a hand saw to cut the remainder.
 You should have four equal sized pieces of the pallet. Stacked on top of each other, you get the idea of how the bench will look. At this point, decide which side you want to face front and the order you would like to stack the pallets. I had some ends that were cracked on my pallet so I faced them towards the back. Also, I put the best quality shelves toward the top of the bench because I figured you would see them more.
 Now we need to reinforce the bench shelves to be strong enough to hold a person's weight. Measure the width of the pallet.
 Taking a 2"x4" board (the reason why the pallet needs to be 2"x4" construction) cut 8 pieces of the board into the width of the pallet (18 inches).
 Starting with bottom half piece, attach the 2"x4" along the outside edges of the pallet, like below. I used screws to do this.
 Turn the pallet over (this is your bottom rung) and measure the width of you two boards. The height of a normal pallet space is not tall enough for most men's shoes. I needed to expand this, so I did so by adding boards to the top of the supports.
I did this with a chisel and hammer. I just chiseled around the nails and then used the hammer to pull them out. You want to remove the bottom to extend the spaces between shelves for bigger shoes.Your pallets should look something like this:Next, cut them both in half the width way. Make sure you measure so they are all even pieces. Measure twice!Now, most likely, your circular saw won't cut all the way through the thickness of the wood, so I used a hand saw to cut the remainder.You should have four equal sized pieces of the pallet. Stacked on top of each other, you get the idea of how the bench will look. At this point, decide which side you want to face front and the order you would like to stack the pallets. I had some ends that were cracked on my pallet so I faced them towards the back. Also, I put the best quality shelves toward the top of the bench because I figured you would see them more.Now we need to reinforce the bench shelves to be strong enough to hold a person's weight. Measure the width of the pallet.Taking a 2"x4" board (the reason why the pallet needs to be 2"x4" construction) cut 8 pieces of the board into the width of the pallet (18 inches).Starting with bottom half piece, attach the 2"x4" along the outside edges of the pallet, like below. I used screws to do this.Turn the pallet over (this is your bottom rung) and measure the width of you two boards. The height of a normal pallet space is not tall enough for most men's shoes. I needed to expand this, so I did so by adding boards to the top of the supports.
You will need to measure the edges (the 2"x4" you just screwed on) and the width of your middle supports. (If using a 2"x4" pallet, it will be about 3", hence the milled board above.) You don't have to do this if you don't want to. I just didn't want any overhang, but you could easily center the height extension boards. Cut the boards down to 18" long, there will be eight cuts.
Each shelf also needs some center support boards, so I cut two center supports for each shelf and two end supports for each shelves.
You should end up with
6- 2"x4"x18" boards (2 were already used)
8- 2"x2"x18" boards
8- 2"x3"x18" boards (unless you didn't mill down the boards)
Here's my cut pile (and my son's shoes):
Next, screw your center supports into place:Starting with the bottom shelf, screw the two 2"x3"x18" boards to the tops of each of the edges. (Note: If you plan on finishing the bench, this is the part I wish I would have sanded the bench. It was very hard to sand the bench once all the shelves were put together.)Now, stack your next pallet shelf on the bottom. Use the pallet overhang to screw it in place to the shelf below.You should have something like this:Place your 2"x4"x18" side piece on the pallet overhang and then put the top 2"x3"x18" piece on the top of the ends. You are using your 2"x3"x18" to hold the side piece in place. You need to screw down the top piece (2"x3"x18") to hold the side piece in and to attach to the shelf. (Note: I drilled a hole and then screwed in the screw. I just found it easier and I didn't want to split the wood. I wasn't sure how the pallet would would hold up to just drilling a screw in.)Repeat the process. I used very long screws because I wanted to make sure that the screw went all the way through the shelf, into the side piece of the shelf below.You should end up with something like the picture below. (You might want to use clamps if your boards are bowed a little.)Now it's time for the top. I purchased a 1"x6" pine board for my top. I didn't want anyone snagging their clothes on the rough pallet wood, so I thought the top should be smooth. Measure the width of your bench, in my case it was 48" (including the overhangs on the side), and cut your board into 3 pieces.Place your boards across top of the bench (there will be gaps in between them) and mark your drill marks. I decided to nail on the top, to add sort of a rustic feel. I had some large roofing nails that I liked the look of, so I used them. I did drill holes part of the way before putting the nails in so I was easier for me and I didn't dent the wood.You should now have a bench that looks something like this! Now you have to flip it over to add the wheels.I added wheels to mine, to make it easier to cleaning under.I bought these casters from Amazon.com and they are suppose to hold enough weight for the bench. I am proud to say that this is the only step I had to ask my husband for help on. I can't lift the bench to flip it over by myself!
After sanding (for weeks), staining, and applying the polyurethane, the bench is finally finished!
The total cost: Pallets (free) + wheels ($18.88) + boards ($13.25) +Stain (free, already had it) + Screws & Nails (free, already had them) = $32.13
Not too bad if I don't say so myself!
In addition to the bench, I found plans for an above storage and coat hook organizer from ana-white.com. (Here are the plans: Ana White Entryway Storage Shelf with Hooks) I don't know if you have seen her site, but I am in LOVE with it!
It was very easy to build and cost about $25.
Finally, my mud room coat and shoe storage is complete!We have had several people over since building it and I have actually had to convince people that this bench was built from pallets. It's a great way to use up some old pallets and add less to our dumps. Plus, it's cheap and easy!
I am building a 15 shelf, 84" tall wine rack that should hold about 120 bottles of wine! One shelf is assembled already, only 14 more to go!
~Beth


25 comments:
So awesome Beth!!!! That looks amazing!
I do not know how you do not have a hundred comments on this! It is absolutely gorgeous! I am heading over to find a follow button! (wink)
Where do you get your pallets? Thanks! Awesome project!!
I got the pallets from our local lumber yard. I think if I were you I would look for businesses who have them stacked up and see if they want to get rid of any. To some businesses, they are just a pain.
I love this. I was doing the same thing as you, searching all over the place for affordable shoe storage. Thank you SO much!!
Glad you like it! We use it all the time and I am really glad how it turned out. Let me know how yours turns out! Best cheap, bench I have found yet!
Love this! it is amazing!
shoe cupboard
I absolutely LOVE this idea! I know it was a while ago now, but do you by chance remember the brand and color stain you used? It's perfect. Thanks for sharing this cool idea!!
I used just a normal mahogany stain and then used Varathane stain and polyurethane in one in mahogany to coat over the top. I hate painting on polyurethane! :)
This was impressive. A shoe storage bench is a must if you have a family.
It keeps things so much neater.
What color is the stain? It looks great!
The color of stain is mahogany from Minwax
Just for the record, what a fantastic idea!! It looks beautiful. And it's from pallets... hahaha. Thanks for sharing. :)
This is great - you gave me a really nice roadmap to do this with, I'm going to send you a picture of mine when it's done.
Thanks for doing this!
Louis
Mademoiselle
Just for future reference, when installing fasteners(nails, screws, etc) into wood, the fastener needs only to be about 2.5 times the thickness of the wood.
Example: for a 1x4 board, a 2.5 inch fastener is more than enough...for a 2x4, a 4 inch fastener is the minimum length you should use.
There are exceptions to this rule, but this is just a general rule of thumb to go by.
ow, as for my opinion of this project.
You have outdone yourself Madam!!!
it is nothing short of gorgeous!
And I can tell by the way you built it, that this is something you can pass down to your children/grandchildren.
Were it me that had made this, I'd be bragging about this for the next 6 months to a year! LOL
Thank you for sharing this with all of us.
May you have a very Merry Christmas!!
Would it be difficult to take out a couple of rows in the middle to make it possible to store boots? Or would that weaken it structurally? This is beautiful!
You might be able to take out a few of the middle supports but yes the structure would be weaker. I honestly think it would work though. I guess if it breaks, it's only a pallet and you could just cut up another one! Thanks for checking out our blog!
Great! Well done! Put it on the list...
:)
L
Fantastic idea, I'm building one this weekend. Just a thought, would probably be easier to sand the pallets before you join them together. Likewise staining the inside would be much easier before assembly. For people who don't have a circular saw and don't want the added expense of buying one. Remember you can have boards cut at your local hardware store. Home Depot, Lowes. They won't rip a 2x4, but you can buy a 2x2 and let them cut that. Just a thought.
That is an expectional work you have done. Warehouse Storage Systems are very helpful at times. Thanks for sharing this. Keep exploring.
That looks fantastic, I think I'm going to try my hand at building one of these. Thanks for the inspiration :-)
Great job:). I will try to find some pallets and get to work. Lol
Great job:). I will try to find some pallets and get to work. Lol
Well done Beth
Been a few seasons now..how is it holding up??
Great job....now my wife won't stop nagging me to get this done for our new back door area..hahalol
Post a Comment