Sunday, February 24, 2013

Sophistication Sunday - CoverGirl Clump Crusher Mascara

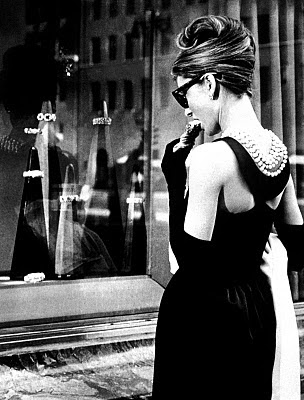
My Sophistication Muse, Audrey Hepburn

Sophistication Sunday revolves around my favorite beauty finds, techniques, fashion trends and anything else "pretty" that catches my eye. I look forward to sharing these ideas with you and hope to hear your suggestions and feedback as well! I am no expert at beauty or fashion by any means but perhaps that will make my thoughts more relatable. Simply put, I'm just a girly-girl navigating my way through the fabulous finds I come across.

...

Hello everyone!  I wanted to hop on quick and write a beauty post about my new favorite mascara the CoverGirl Clump Crusher.

I know I've said before that CoverGirl isn't currently one of my favorite makeup lines.  I really like the prices (obviously) but as far as drugstore brands goes I've had much better luck with Revlon and Maybelline.  CoverGirl is very hit and miss for me.  Luckily this time, it is a BIG hit!

So many people LOVE the CoverGirl Lash Blast mascara (in the big orange tube) but I never understood the hype.  Like Maybelline's famous Great Lash mascara I thought it was just... "meh."  I didn't see what the big deal was about lash blast other than the fact that it was the first drugstore mascara I saw that had the rubbery bristles.  

However, I got a little adventurous the other day and decided to spend $5 on the newest CoverGirl mascara.  CoverGirl describes this product as:

A breakthrough in no-clump mascara. Get 200% more volume and zero clumps. Features an innovative double-sided brush with lash-loading and clump-combing zones to crush clumps.

I am SO glad I took a chance on this! When I used it for the first time I was amazed when I could keep coating, and coating, and reapplying.  My lashes didn't stick together, they didn't clump... the application was amazing!  Another great bonus is that it doesn't flake off throughout the day and it doesn't leave my lashes feeling stiff or dry.  Put one down in the win column for CoverGirl!

I also want to mention that the brush is great for bottom lashes and I love a mascara that works well for upper and lower lashes.  

Have you tried the clump crusher?  Will you give it a shot?  


~Christi


Monday, February 18, 2013

Concealing Under-Eye Circles in 3 Easy Steps

It seems like I've been battling dark circles ever since I started wearing makeup.  Over the years I've tried numerous concealers and eventually found my match in MAC's Studio Finish Concealer.  You can read all about my undying love for it here


However, I wanted to write an update because I've developed a little under-eye circle "routine" that I am very pleased with.  It's a three step process that can be duplicated with either drugstore items or high-end products.  

Step 1:  Brighten

I've tried numerous neutralizers and different correcting shades but brightening the under-eye area seems to provide the best foundation for treating dark circles.  

The product I use for this step is Maybelline's Instant Age Rewind Erase Dark Circle Treatment Concealer (holy moly, what a mouthful!) in the shade, you guessed it, "brightener"  (the pink-ish shade).  If you prefer a high end alternative, try Benefit's Eye Bright.


To use the product you just turn the base (and it makes that click-click-click sound) and the liquid comes up through the sponge applicator. From here you can just dab it on under your eyes in a triangle pattern (one corner at your inner eye, the second corner at your outer eye, and the third corner pointing down towards the tip of your cheek) and blend. Quick tip: after using this product for a little while I realized that the sponge soaks up a TON of the makeup. So in my effort to be cost effective I ripped off the sponge applicator. Now I just need a couple clicks to get the amount of product I need.  I apply it right to my fourth finger and tap and blend it under my eyes.  


Step 2:  Conceal

For this step feel free to substitute your favorite concealer.  I of course turn to my MAC studio finish.  The price is a bit steep at $18.00 but as I've explained before, I used to buy concealer that was $7 a pop and I would have to buy it probably once every 1-2 months.  This concealer lasts me a YEAR at a time, covers blemishes as well, and is more than cost effective considering how frequently I was having to buy drugstore concealer.

I simply dab my fourth finger into the pot and then pat it under my eyes and blend.  I think one of the keys to this is to remember that more product does not mean better coverage.  A lot of people don't like the MAC studio finish for under-eye coverage but I find using just a little goes a long way and as long as you don't cake it on.  Love it!


Step 3:  Set

For this final step I use ELF's Studio High Definition Undereye Setting Powder.  This lovely little product clocks in at $3.00.  Woo hoo!  If you're looking for a high-end option I've heard good things about Bare Minerals Well-Rested SPF 20 Eye Brightener.  


To finish off the coverage I use my Sigma F86, dip it into the pot, tap off the excess, and dab under my eyes (from inner corner to outer).  I find this last step really prevents that annoying crease under the eyes and sets my under-eye makeup for the day.  


Truth be told, I don't do this every day (because sometimes I'm lazy, obviously) but I do find this is the best way to deal with my dreaded dark circles and thought I would share it with you guys!

Do you have any tips for concealing under-eye circles?  Share below!  


~Christi


Monday, February 11, 2013

Lime & Avocado Pork Tacos

Everyone loves a good Mexican dish, but usually it comes with some SUPER high calories. Not these yummy Lime & Avocado Pork Tacos! Cooking the meat in a crockpot helps retain the pork's juiciness  The lime adds just the right kick to compliment the spice of the jalapeno and buttery texture of the avocado. At 384 calories for 2 tacos, this will be one Mexican dish you will for sure repeat!

1.5 pounds pork loin filet, cooked
1 tablespoon of olive oil
2 tablespoons taco seasoning mix
1 tablespoon cumin
1 teaspoon of pepper
1/2 cup water
1 onion, sliced thin
1 jalapeno, seeds removed and sliced thin
1 lime, juiced
1/2 cup cilantro, chopped
1 tomato, diced
1 avocado, sliced in strips
12 corn tortillas

1. In crockpot, place pork loin and cook on low for 6 hours. Shred when cooked.
2. Heat a olive oil in a large nonstick skillet. Add pork, taco seasoning, cumin, pepper, 1/2 cup water, onion and jalapeño to pan; sauté 8 minutes or until tender.
3. While pork is cooking, heat oven to 400 degrees. Place corn tortillas on cooking stone or baking sheet and cook 5 minutes. Turn over and cook 5 minutes more.
3. Stir in cilantro and lime juice; cook pork until warm.
4. Serve tacos by topping corn tortilla with pork mixture  chopped tomato, sliced avocado  and some chopped cilantro. Enjoy!


The Skinny: Serves 6 (2 tacos each) for 384 calories

source


Like this post?

Thursday, February 7, 2013

DIY: Valentine's Day Heart Bird Feeder

Is there anything sweeter then a little boy and his Grandma?? Or in my son's case his Farmor? There is! And that is watching them make these super cute heart shape bird feeders together!

Here is what you need to make these super cute bird feeders ---btw a GREAT gift idea for Valentine's Day! 

1 1/2 cups of birdseed
2 (1/4 oz) packages of unflavored gelatin
heart shaped cookie cutters
cooking spray
wax paper
twine

Step 1:  Mix 1/2 cup of water and gelatin together in a bowl.

Stir until dissolved.


Step 2: Pour in 1 1/2 cups of birdseed.


Step 3: Measure about 7 inches of twine out and cut it.

Tie the twine in a knot to make a loop.

Step 4: Lay heart shaped cookie cutters on some wax paper and spray with cooking spray.

Step 5: Fill the cookie cutters half full of the birdseed mixture.

Step 6: Press the birdseed down into the cookie cutter.


Step 7: Lay the twin loop on the birdseed.

Step 8:  Top the twine with more birdseed until cookie cutter is full.  (Look at those cute little hands!)

You will end up with a couple really cute heart-shaped filled cookie cutters.

Step 9: Let the cookie cutters dry for a few hours and then gently unmold the feeders. Let the birdfeeders dry for another 72 hours until hard.

 Step 10: Find a nice spot, preferable near a window, to hang your finished heart bird feeder.

And enjoy the view as you show the birds in your neighborhood some love!!!


Like this post?

Monday, February 4, 2013

Organizing Under The Sink

A few weeks ago I came across this post on Pinterest on how to organize your house one day at a time from www.mysimplerlife.com. The idea was simple-- each day of the year have one very small task to complete for a decluttered home. I decided to give it a try. I don't necessarily follow her calendar in order (especially since it's from 2012), but one task a day is my goal. 

One day I was doing the dishes and noticed how under the sink in my kitchen was a mess! 

I hate having to dig in this cupboard to find my cleaning products, scrub brushes, or large bottles to refill my smaller bottles. This NEEDED to be organized!

I came across this picture from tidymom.net and thought it was such a great idea to keep bottle organized and arranged nicely under the sink. 

However, I have a pull out organizer that holds all of my dish towels and there is no way I could install the tension rod under my sink. I needed another idea. I was going through my bin of organizing extras and came across this $2 towel rod.

I installed the rod on the side of the cupboard and hung up a couple hooks for my brushes.  

After hanging all the bottles, I organized everything remaining from least used to most used. The least used items were placed towards the back (large soap containers to refill small container, compost filters, odd cleaning items, etc.) After rummaging through the rest of my organizing items, I was able to use a basket and a glass jar container for my dish soap.

It may not be the prettiest cupboard under the sink, but it was fast, easy, free and now ORGANIZED! 

Have a small tip that you have found that keeps your life a little more organized? I would love to hear with a comment below! 


Like this post?

Like This?- Pin It!

 
Copyright 2009 between3sisters