Showing posts with label ingoodrepair. Show all posts

Monday, February 4, 2013

Organizing Under The Sink

A few weeks ago I came across this post on Pinterest on how to organize your house one day at a time from www.mysimplerlife.com. The idea was simple-- each day of the year have one very small task to complete for a decluttered home. I decided to give it a try. I don't necessarily follow her calendar in order (especially since it's from 2012), but one task a day is my goal. 

One day I was doing the dishes and noticed how under the sink in my kitchen was a mess! 

I hate having to dig in this cupboard to find my cleaning products, scrub brushes, or large bottles to refill my smaller bottles. This NEEDED to be organized!

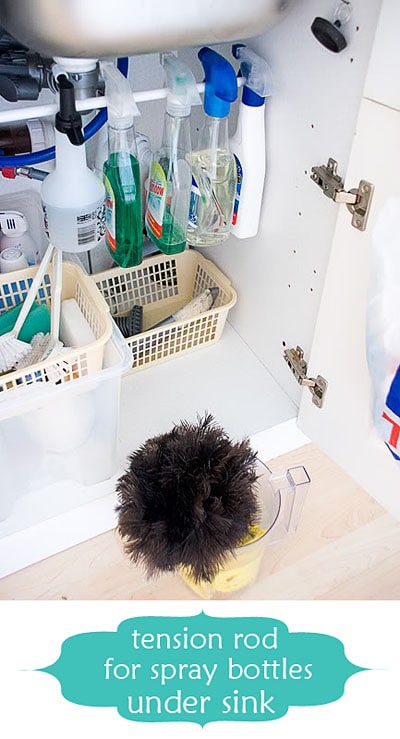
I came across this picture from tidymom.net and thought it was such a great idea to keep bottle organized and arranged nicely under the sink. 

However, I have a pull out organizer that holds all of my dish towels and there is no way I could install the tension rod under my sink. I needed another idea. I was going through my bin of organizing extras and came across this $2 towel rod.

I installed the rod on the side of the cupboard and hung up a couple hooks for my brushes.  

After hanging all the bottles, I organized everything remaining from least used to most used. The least used items were placed towards the back (large soap containers to refill small container, compost filters, odd cleaning items, etc.) After rummaging through the rest of my organizing items, I was able to use a basket and a glass jar container for my dish soap.

It may not be the prettiest cupboard under the sink, but it was fast, easy, free and now ORGANIZED! 

Have a small tip that you have found that keeps your life a little more organized? I would love to hear with a comment below! 


Like this post?

Friday, November 30, 2012

DIY: Hidden Storage Wall Cubby

A few months ago, I wrote a blog about my Paint Only Remodels of our Main Bathroom. Now I have talked about this about a million times before, but if you missed it-- I am only allowed to remodel this house using paint. We plan on building a new house on this land in a few years, so my husband doesn't want me to waste money on something we will eventually bulldoze. (You can read more about it on the blog above.)

Part of the issue with our bathroom is storage. We have three drawers and two cupboards...which are all a perfect height for a toddler to get into and unpack every day while getting ready. It's very annoying. We have tried drawer hooks, but he still gets into them. I set out to create another storage unit on the wall, but we really didn't  have room for another medicine cabinet, so I came up with this idea for Storage Wall Cubbies. A few months ago I created these fake paintings and wrote a little DIY Faking a Painting.

I thought they would be great to use as a cover to a wall cubby! A great way to hide the clutter and add some art to the wall. Here is my little DIY on how I created these Hidden Storage Wall Cubbies

To start you need to create two 10"x10" Storage Wall Cubbies:
1'x4'x7' Pine Boards
2' square of 1/4" plywood
Nailgun (or hammer and small nails)
Miter Saw
Table Saw
Wood Glue
4 small hinges
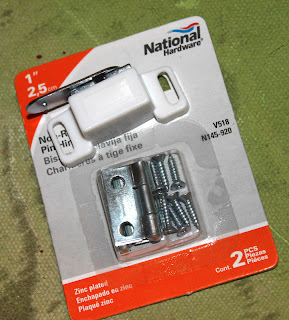
2 cabinet magnet catches

First cut your 1'x4'x6' pine board into 8 pieces that are 10" long with a 45 degree angle on each piece:

Each cubby will need 4 boards that look like below. I like to line them up to make sure they are all the exact same size.

With the boards above, you will assemble your wall cubby. I started with gluing the boards together to make a square.

You will end up with a square like below. (Use can use a L-square ruler to make sure it is square.)

Using an nail gun (or just a hammer and nails) reinforce the box in each corner.

Measure the outside of your cubby box and cut the 2' square of 1/4" plywood into two pieces to be the back of your cubby box. My cubbies are 10"x10" so I cut the plywood to be a 10"x10" square.

Attach the back using a nail gun (or hammer and nails) to create more support to the box. 

You now have a finished wall cubby (or two in my case!)

Now we need to sand and paint it to look professional :) Most likely, you will have some sort of a little gap where the boards meet. Use some wood fill to fill this gap.

Let it dry overnight.

Then sand it with 60 grit, 100 grit, and then 200 grit.

Paint the box your desired color. My frames on my fake paintings are brown, so I matched the color for the cubbies. 

After two coats and a day of drying you should have two wall cubbies that look like this:

Next, install the hinges. Measure two inches from the top and bottom on the frame of your fake paintings.


Install the hinges and you will have a frame that looks like this:

Next, on the cubbies mark where the hinges of the fake painting will meet cubbie. Make sure you give them enough room to close and line up on the cubby straight.

Drill holes in the cubby for the hinges and then screw the hinges in place. 

Now to attach the magnetic catches. These will make sure the frame on the front will stay closed.

Measure two inches to the inside of the cubbies.

Install the magnetic catches. 

On the frame of the fake paintings, install the metal plate for the magnetic catches.


You should end up with some finished Hidden Storage Wall Cubbies that look like this.


Install them on the wall, preferable in a stud so they can handle weight of whatever you put in them. Once installed you have a couple of Hidden Storage Wall Cubbies that hide all your junk you don't want people to see and 

add a little wall decoration to the bathroom at the same time!


Like this post?

Thursday, October 11, 2012

Cleaning Queen Tip #2: Cleaning Stains From White Carpets

This post is dedicated to our mother, the cleaning queen. As long as we can remember, our Mom has always had some crazy cleaning tips that work like magic! To this day, we still bring over our laundry to have her get a spot out or ask her for tips on those hard to clean items. She always has a recommendation that works 99% of the time. We thought it would be nice to share some of her genius cleaning tips periodically. Thanks Mom for all you have done for us over the years!

Today's' Tip:
Cleaning Stains From White Carpets

Back in April, I was working one morning and my son was playing so quietly beside me.


 I should have known something was wrong, that is when I turned to see this:

Yep, that is maple syrup he is drinking out of the jug and that lovely maple syrup stain has been on my carpet forever! I have tried to scrub it out with various carpet cleaning chemicals, but it just has stayed there.

It's a little lighter than the original, but still there.  

One day I was complaining to my Mom about how bad our carpet looks and that I can't seem to get this stain out and another (where I spilled an entire cup of coffee.) She told me to try vinegar and baking soda. 

I thought, "What the heck!" At least we will have fun watching the chemicals react. So I sprinkled some baking soda on the stain. 

And poured some vinegar over the top.  

 We had a little floor volcano that was fun to watch. (My son loved watching it.)

And then I scrubbed it in with a brush. (I alternated with my son, who finds scrubbing stains out of carpet super fun.)

My Mom told me to put a white towel over the spot and let it dry. (White, so the color of your towel will not bleed onto your carpet.) 


After letting it dry, vacuum up the remaining baking soda. And the stain is MAGICALLY gone!!
The only bad part is now I have a white spot on the carpet where I cleaned it! It just shows you how bad these carpets need to be professionally cleaned. I am sure we will track on it enough to blend in with the rest soon enough! Also, not sure if this will work on colored carpet, so I am just giving you a warning to maybe stick with white carpet only. 

Do you have any awesome cleaning tips you would like to share? If so, comment below. We would love to hear any ideas to make cleaning easier!

Tuesday, September 4, 2012

Garage Sale Redo: The Ikea Trofast Shelf Part 2

The time has finally arrived, the reveal of the Garage Sale Idea Trofast Shelf.

If you recall in my last few blogs, I have been looking for a way to add more toy storage to our house. I originally built this open bookshelf, but it has proven to not be enough storage needed for all the toys we have accumulated over the last almost 2 years. 

With the second child coming, I knew we would need something else. That was when I saw this beauty of a organizer at a garage sale for $5.  (Garage Sale Redo: The Ikea Trofast Shelf)

However, I did not like how it fit with the bottom piece--it was just not wide enough and looked very funny. I decided to add some side shelves to the Ikea Trofast Shelf (here is the tutorial DIY: Building Furniture Side Bookshelves) and ended up with something like this:

After the shelves were added, I sanded and primed the Trofast Bin Shelf.

Then I painted it to match the lower unit. (Please ignore my super messy shop, just one the thing many things on my to-do list to organize!)

 I attached it to the open toy box and filled it with the bins.

It was complete!! We have lots of extra toy storage and a place for books to go!

Also, as an added bonus I found out that I had some baskets that fit the top of it perfectly, so even more toy storage!! (Just so you know, half of the bins are empty and the baskets are empty, just room for more toys someday!) 

Anyways, it's amazing what you can find at garage sales and what you can build with just a little extra work. I hope I have inspired some of you out there to go treasure hunting at garage sales soon! Until then, happy building and painting!!


Like this post?

Like This?- Pin It!

 
Copyright 2009 between3sisters