Showing posts with label whatscookin. Show all posts

Monday, November 9, 2015

Sheila's Homemade Granola

One of my goals of 2015 is to eat healthier and consume less sugar. One of my "go to" snacks is Greek yogurt, 1 teaspoon of agave nectar, and 1/4 cup of granola. I LOVE this stuff! It's filling, healthy, and a sweet treat during the afternoon that packs some protein. The problem is, is that most granola mix from the store and VERY high in sugar. I don't honestly need that much sugar in my granola, I really just like it for the texture.

I remembered that my MOL makes her own granola and it is totally delicious! It was crunchy, sweet, but not too sweet. She sent me the recipe and I made it! IT WAS DELICIOUS! I only swapped the raisins for cranberries in mine (my husband doesn't like raisins) and the wheat germ with ground flax seed.

Up close image of the spices, cranberries, and almond slices.

Best of all about this Granola recipe, it's super healthy for you. Just compare my food stats to Udis, Natural Artisan Granola, Original (my normal "go to" granola).

Sheila's Homemade Granola


Sheila's granola recipe has less calories and less sugar. It was totally worth the little bit of effort it takes to make your own granola. 


Sheila's Homemade Granola
 5 cups old-fashioned oats
1 cup brown sugar
1 cup flaked coconut
1 cup flax seed or wheat germ
1 tablespoon ground cinnamon
1 teaspoon ground nutmeg
1/2 cup water
1/2 cup vegetable oil
1 teaspoon vanilla extract
1/2 cup dried cranberries or raisins
1/2 cup sliced almonds


Directions: Preheat oven to 325 degrees F. Mix oats, brown sugar, coconut, wheat germ, cinnamon, and nutmeg together in a large bowl. Stir water, oil, and vanilla extract into the oat mixture; spread onto a baking sheet. Bake in preheated oven, stirring every 15 minutes, until golden brown and crunchy, about 1 hour; transfer to a bowl. Stir raisins and almonds through the granola.


Like this post?

Monday, November 24, 2014

Perfect Whole Grain Freezer Pancakes

Every morning I ask my kids what they would like for breakfast, and their answer 95% of the time is PANCAKES. Now getting up every morning making pancakes gets tiring and on some sleepless nights it sounds terrible! On special occasions I do make my own pancakes, but in the last year I have gotten lazy and started buying pre-made pancakes. You know the one you find in the freezer section? 

There are a few problems with this:
1. They are expensive. 
Homemade anything is usually cheaper then the pre-packaged version.

2. All are made with white flour. 
I am not anti-white flour but research after research shows everyone needs more whole grains in their diet. I think it's better to start your kids out younger eating the whole wheat flours, so as adults they have adjusted to the taste difference (because there is one) and will hopefully enjoy (and choose) the healthier version. 

3. Packed with preservatives.
Again, I am not anti-preservatives, they are necessary in some foods to help them keep longer. However, if I can't pronounce you preservative ingredient in a simple pancake recipe (which for hundreds of years people have been making at home without preservatives) then I probably shouldn't be feeding it to my kids. 

4. Environment Impact
Ok, yes I know my hippie self is coming out, but all of the pre-made pancakes come in a cardboard box and about every 3 pancakes are wrapped in a plastic bag. Just imagine how much garbage goes into landfills each year? I am just adding to that with each plastic bag I unwrap because I have been too lazy to make my own pancakes?

With all those reasons listed, I have been on a hunt for the PERFECT whole grain pancake recipe. I have tried many other recipes on the internet and have been highly disappointing with most of them. Either the whole wheat flour alters the flavor too much, the texture is off, they are flat, or too fluffy. Finally, I can say I have found the PERFECT recipe! The kicker to this recipe is the dry mix can sit pre-made in your cupboard for weeks if you feel like stirring up a batch of fresh pancakes OR you can make a bunch of pancakes and freeze them! Here's my recipe and I hope you enjoy!
{now only if I could learn to pour the perfect pancake}

Perfect Whole Grain Pancakes

Dry Mix:
4 cups whole wheat flour
1 cup All-Purpose Flour
3 1/2 cups old-fashioned oats
4 tablespoons sugar
3 tablespoons baking powder
1 tablespoon salt
1 tablespoon baking soda

1. Pulse old fashioned oats in food processor so they are broken up a little. Do not puree into a flour. 
2. In a large bowl, mix oats, flours, sugar, baking powder, salt, and baking soda.
3. Store in airtight container.

To Make The Pancakes:
1 Cup of Dry Mix above
1/4 cup vegetable oil
1 cup buttermilk or unsweetened almond milk
1 tablespoon of orange juice
1 large egg

1. Place 1 cup of dry mix into a bowl.
2. Whisk in vegetable oil, buttermilk/almond milk, orange juice, and 1 large egg.
3. Cook on a oiled skillet or griddle.

TO FREEZE YOUR PANCAKES:
1. Lay pancakes out on a cookie sheet. Do not overlap them.
2. Place in freezer for 1 hour or until completely frozen. 
3. Remove from freezer and place 3-4 in plastic freezer bag. 
4. When ready to eat, place in microwave for 60 seconds or until hot.
Tip: Save your plastic bags to reuse when you make them. 


Like this post?

Sunday, October 26, 2014

22 Healthy Freezer Meals for Maternity Leave

Many of you might not know this, but my little sister Christi (who also writes for this blog) is 9 months pregnant. Here is her beautiful pregnancy photo here:
{Adara Photography~She is AMAZING!}

With her expecting her first child, one of the main pieces of advice I could give her is to make some freezer meals. I didn't make them with my first child but I stock piled them with my second and honestly it was a HUGE lifesaver! **PS- This is going to be the longest blog EVER!!**

Over the last few months we both have pinned quite a few freezer meal ideas but there were a few problems with some of them:

1. They Are Unhealthy
 Many of them use bricks of cream cheese, loads of shredded cheese, and lots of white pasta. We really wanted meals we felt like we could eat and not feel super guilty for just eating enough calories to support a normal sized human for a week. 

2. The Prep Time Is Ridiculous
There are a lot of recipes out there that the prep time is crazy. I don't want to sit there and wrap each individual thing, saute this for 2 hours, etc. We wanted some that we could throw together and be done! 

3. Cheap Protein & More White Pasta
Many of the bulk freezer meal recipes out there claim to make '20 Meals for $50' or some other cheap amount of food. I looked into some of them and when you tell me to use 1 frozen chicken breast to make 4 meals, that just seems crazy. Protein is a good thing, it keeps you fuller longer and makes you eat less. And last time I checked, adding more white pasta to a meal to make it "stretch" is honestly not good for you. With our meals here, we used protein and we used GOOD protein. We used lean beef, boneless skinless chicken, and cut our own pork loin. 

4. Sweet Meat
Christi does not like sweet sauces on meat. I don't mind them. However, in keeping with the somewhat healthy theme, adding less sugar is always a good thing in my book. 

5. Many Freezer Meal Are Gross
Some things DO NOT freeze well. It's true. I would say about 50% of the meals I have tried to make into freezer meals just didn't thaw and bake up as good as they were the first time. We wanted to try to find recipes that actually taste good after they were frozen and I am confident we did. 

With all that said, we had a little bit of a challenge picking out the meals, but because I have made frozen meals in the past I had an idea of what froze well and what didn't. So here is our list of 

 Healthy Maternity Freezer Meals*
{Prego Christi preparing for 2 hours of freezer meal prep!}

*Disclaimer- I am saying healthy because the calorie content of these meals is very reasonable for the portion size. You will notice in many of the meals we did use *Cream of Whatever* soup which many people do not find healthy. We used the 98% Fat Free soup, as a means of simplicity in preparing these meals. If you are not a fan these canned soup, feel free to look up a recipe to make a homemade version. I was unsure how the homemade version would freeze up so I stuck with the canned because it has worked in the past for me. 

Chicken and Wild Rice  x 4
Chicken Taco Soup  x 4
Goulash  x 4
Tater Tot Casserole  x 4
Creamy Ranch Pork Chops  x 4
Parmesan Pork Roast  x 2

That's a grand total of 22 meals!
{We did not use all that cheese (only a half of one bag) but we did use the rest of the ingredients!}

Now before you begin, here are a few tips for you:

Tips For Freezer Meals:
If you haven't ever prepared a bunch of freezer meals, I can give you a few tips:

1. Buy Half Size Aluminum Steam table pans and lids.
They are about $5 for 15 of them and $5 for the lids. They are great to keep on hand and less dishes are always a good thing with new babies.

2. Buy Crock Pot Liners & Gallon Bags
Again, less crock pot cleaning is always a good thing. You will need the gallon bags for some of the meals. 

3. Buy In Bulk
We purchased a large pork loin and cut our own pork roast and pork chops. You get so much more meat for a lot less cost. Also, we bought boneless, skinless chicken, and 88% lean ground beef to keep things healthy. Large bags of frozen veggies are the best and cheaper then the canned. 

4. Prepare throughout the week
-Dice up onions (or other veggies) 
- Brown ground beef
- Use a crock pot to cook your chicken (just throw it in for 8 hours with no water) and then use a Kitchen Aid Mixer to shred it (or two forks)
- Cook up rice another day
- Do not cook up pasta in advance. It will stick together. 

5. Make a Recipe List
Know how much you need of each item and organize your ingredients at home by recipe. 

6. Make a Shopping List
Go to the store with a list of what you need organized by department.

7. Print Labels For Your Containers
Label your containers earlier in the week and set them with the ingredients. Each label should give you the recipe name, calories, how to prepare, and if any other ingredients are needed. 


After you have all that done, you are ready to begin. It took us about 2 hours to assemble all of these. Now the recipes below are in one meal quantities. I left them this way so you can decide how many meals you want to make and just double, triple, quadruple...whatever the recipe. 
So without further adieu here are the recipes:

Chicken and Wild Rice 
1.5 cups wild rice 
10.75 oz  cream of 98% fat free mushroom soup
10.75 oz  cream of 98% fat free chicken soup 
1 small can mushrooms, drained
16oz chicken breast
1 cup slivered almonds, optional

1. Cook rice according to package. Mix in both cans of soup and mushrooms. 
2. Pour in to freezer dish and top with 1 pound of chicken pieces and sprinkle with slivered almonds. 
3. Double wrap in heavy duty foil, label and freeze. 

FREEZER INSTRUCTIONS: Thaw and bake uncovered at 350 for 1 hour until chicken juices run clear.

Serves 4 @ 456 calories

Chicken Taco Soup
1 onion, chopped
1 (16 ounce) can chili beans
1 (15 ounce) can black beans
1 (15 ounce) can whole kernel corn, drained
1 (8 ounce) can tomato sauce
1 (12 fluid ounce) can of chicken broth
2 (10 ounce) cans diced tomatoes with green chilies
1 (1.25 ounce) package taco seasoning
12 oz chicken breast
Combine all ingredients into a Ziploc bag. Freeze. 

FREEZER INSTRUCTIONS: Thaw and cook on low for 6-8 hours. Serve topped with shredded Cheddar cheese, sour cream, or tortilla chips, if desired

Serves 6 @ 391 calories
Goulash
1lb ground 88% lean beef
10 oz  tomato soup
6 oz Tomato Paste 
2 cups uncooked whole wheat elbow macaroni
2 Tbsp Italian seasoning
1 can (15oz) corn, drained
1 tsp garlic powder
1 tsp onion powder
4 oz shredded cheddar cheese

1. Brown Ground beef (earlier in week)
2. Cook noodles according to package, drain (on day of)
3. In a large bowl, combine soup, garlic powder, onion powder, tomato paste, Italian seasoning, noodles and ground beef.  Stir in corn.
4. Transfer to freezer baking dish and top with cheese. 

FREEZER INSTRUCTIONS: Thaw and bake uncovered at 350 degrees for 30-40 minutes until heated through and melted cheese.

Serves 4 @ 390 calories

Tater Tot Casserole
1 lb. ground beef 
1 small onion, finely chopped 
10.75 oz  cream of 98% fat free mushroom soup 
1/4 cup skim milk 
1 cup frozen mixed vegetables
4 ounces Shredded Cheddar Cheese 
1 lb. tater tots 

1. Brown Beef (earlier in week)
2. To the ground beef stir in frozen veggies, soup and milk. Mix well. 
3. Pour soup mixture into bottom of pan. Top with potato nuggets and then shredded cheese.

FREEZER INSTRUCTIONS: Thaw the meal in the fridge overnight and then bake at 350 covered for the first 30 minutes. Uncover and bake until hot. 

Serves 6 @ 369

Creamy Ranch Pork Chops
4 Pork chops
1 Can Cream of chicken soup
1 Package Ranch dressing (dry)

*Cut the bottom 6”off both ends of loin for roast and then cut the center 1" thick to make pork chops
1. Mix cream of chicken soup and ranch powder together.
2, Place Pork Chops in crock pot bag. 
3. Pour soup mixture on top. 
4. Twist crock pot bag and tie. Place in labeled gallon freezer bag. 

FREEZER INSTRUCTIONS: Thaw over night. Place in crock pot on low for 6-8 hours. 

Serves 4 @ 473 calories

Parmesan Pork Roast
1 boneless whole pork loin roast 
2/3 cup grated Parmesan cheese
1/2 cup honey
3 tablespoons soy sauce
2 tablespoons dried basil
2 tablespoons minced garlic
2 tablespoons olive oil
1/2 teaspoon salt
2 tablespoons cornstarch
1/4 cup cold water

*Cut the bottom 6” off both ends of loin for roast
1. Place pork roast in crock pot bag. 
2. In a small bowl, combine the cheese, honey, soy sauce, basil, garlic, oil and salt;
pour over pork. 

FREEZER INSTRUCTIONS:  Remove from freezer and thaw in fridge for 24 hours.  Cook on HIGH for 3-4 hours or LOW for 6-7 hours. Remove meat to a serving platter; keep warm. Skim fat from cooking juices; transfer to a small saucepan. Bring liquid to a boil. Combine cornstarch and water until smooth. Gradually stir into pan. Bring to a boil; cook and stir for 2 minutes or until thickened. Slice roast; serve with gravy. 

Serves 6 servings @ 518 calories


So that's the meals! I know many of you are wondering how much the meals cost us, so I will tell you. We made 22 meals for $214.04. That's $9.73 for a meal that feeds 4-6! I know that is a little higher priced then some other websites claim to be, but our meals have a lot of protein in them and we bought the healthier version of ingredients which always cost more

{I feel like Yeti should give me some sponsorship money for this pic!}

Also, for your convenience I have uploaded a few documents for you.
1. Freezer Meal Labels ~Just print them on sticker paper
2. The Recipes
3. Excel Shopping List ~Just plug in servings for each meal and it will calculate how much to purchase


Well, I hope I have inspired some of you out there to make some meals ahead of time! I know that when it comes to a new baby, the last thing you want to be doing is slaving over the stove in the kitchen! If you have any question on making these meals, feel free to email us!

Happy Cooking!! 


Like this post?

Saturday, September 20, 2014

Rainbow Birthday Cake

I know it's been a while since my last blog....at least 6 months....but life sometimes gets in the way. I have been very busy chasing around 2 children under the age of 4, planting a huge garden (over 20 tomato plants!), moving wood chips to my flower beds (150 feet of flower beds!), numerous vacations, and so much more! 

I am hoping to post some of the projects I did this summer in the future. For now, I am celebrating this little girl's 2nd birthday! She is my smiley, crying, barefoot, dancing, giggling, yelling, tickling, chocolate eating, thumb sucking little girl Remy! I forget how little they are when they are born :)
 *Photo by Adara Photography 
 *Photo by Adara Photography 

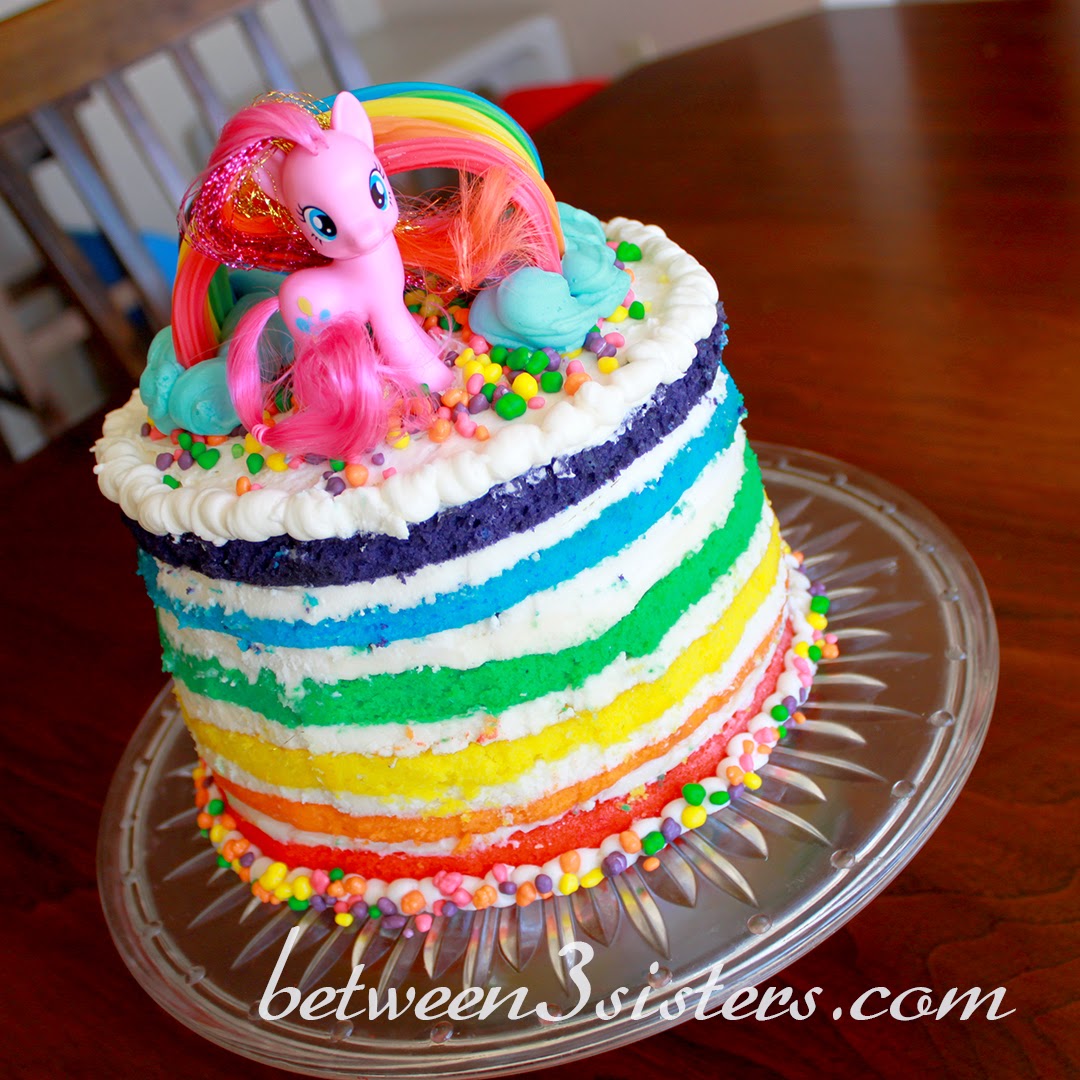
For her 1st Birthday I went with a Pink & Green Princess theme. This year I wanted to do a rainbow theme, so here is her 2nd birthday cake! I threw in a My Little Pony, just because it seemed fitting. (Too bad I couldn't find a Rainbow Bright figure!)

 I used the Pillsbury Bold Funfetti Cake mixes to create the colors. I had to split the orange and blue to make the colors red and purple. I frosted each layer and really felt that if I did the outside it would be WAY too much frosting.  

I added a #2 to the top for her birthday!

The top is made with Nerds and Rainbow Twizzlers, carefully held in place by toothpicks
Here's the back of the cake:

Here is how the cake looked once we cut into it. (Sorry for the blur, I was a little in a hurry trying to serve cake before the ice cream melted.)

Overall, I think it might rank up there with some the best cakes I have made! Thanks for checking out our blog and look for more of my summer projects coming up!


Like this post?

Thursday, April 17, 2014

Low Carb Chocolate Pecan Mousse Cake

Yesterday was my birthday. I won't tell you how old I am, but all I will say is I am closer to 40 then I am to 20! With that being said, I feel like this year, so far, has been a bunch of non-stop trips away from home for our family. Now I am not complaining about this, but I have a big problem with controlling my food intake while not at home! Our next getaway is scheduled 3 weeks from now and I am determined to shed the baby weight before that trip, so I have resorted to something I have never done....follow a diet plan! Without going into too much detail (and maybe I will at a later date if I have success with this diet) I am trying one of those crazy 'low carb' diets. 

And now back to my birthday and the whole reason for this blog --every year for my birthday I have the same thing. A chocolate box cake with a chocolate can of icing. My husband tried for many years to go all out and make me some sort of fancy cake, but I kept telling him that all I wanted was "a box cake and can of frosting". 

Since I am trying to stay low carb'd (under 40 grams a day) I told him to go crazy with making me a "low carb" cake and this is what we came up with. He made the base and I made the topping (because I wanted more chocolate....it's my birthday after all!) This cake to some people would not be the lowest carb cake out there, but you know what...it's good! 
The nutty pecans give a great flavor to the cake part and the semi-sweet dark chocolate mousse topping add extra decadence without going over on the sweetness. I find with many Splenda desserts I can only taste the Splenda and adding the mousse topping really balanced out the sweetness to feel like you are eating a full fattening cake! I hope you enjoy as much as we did!

For the cake base you will need: 
2 cups pecans 
1/3 cup cocoa
1 tsp baking powder
1/4 teaspoon salt
1 cup splenda
4 eggs
1/2 cup butter, melted
1 teaspoon vanilla
1/2 cup water

For the mousse topping you will need:
3.5 oz 70% dark chocolate, broken into pieces
1.5 oz butter
1 teaspoon of salt
2 eggs

To Begin,
1. Preheat oven to 350 degrees and butter a 8-inch spring form pan. 
2. Process pecans in food processor until they are a powdery consistency without turning into pecan butter. 
3. Add cocoa, baking powder, salt, and splenda to the processed pecans. Stir until well combined. 
4. Add the eggs, melted butter, vanilla, and water to the dry ingredients and stir well. 
5. Pour into buttered spring form pan and bake for 25 minutes until toothpick inserted in center comes out clean.
6. Let cake base cool. 

Once your cake has cooled, begin the process for the mousse.
1. In the microwave or double boiler, melt the chocolate with the butter.
2.  Separate the egg yolks from the whites.  Add the yolks to the chocolate mix and 
combine well. Put whites in a cool glass mixing bowl.
3. Add a pinch of salt to the whites and beat them with a mixer until the whites are form soft peaks. (They almost will look like whipping cream.)
4. Fold them in the chocolate mix and then pour mousse mixture over the top of the cake.
5. Store the cake in the refrigerator for 2-3 hours until the mousse is set. 
6. Slice and serve with a dollop of whipping cream or some sliced strawberries.

The Skinny: 16 pieces (you don't need huge ones for this cake) at 238 calories each


Like this post?

Sunday, February 2, 2014

Healthy Super Bowl Menu

Well we made it, February 2nd and it's that Super Bowl kind of time right now. It's also about one month past everyone's New Year's resolutions and if you are still keeping up with yours give yourself a big pat on the back!

Did you know (according to statisticbrain.com) that the #1 New Year's resolution is to lose weight? In the first week of January 25% of people quit their resolutions. And by a month later (now and Super Bowl) only 64% of people are still keeping their resolutions. 

Since losing the last 10 pounds of baby weight was #1 on my New Year's resolutions, I thought making some healthy Super Bowl recipes this year might be just the thing needed to keep me motivated! (By the way I have lost 3.5 pounds!) Who knows, maybe these low calorie recipes will be better then the full fat ones and I might never go back!

(1/4 cup is 75 calories)

I plan on eating this yummy dip on some pretzel crisps!


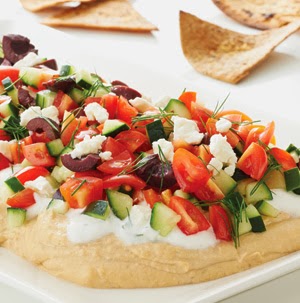
Greek Six Layer Dip
(1/4 cup is 50 calories)


Instead of plating this dip, I am going to place it on top of a homemade, low calorie, thin pizza crust I make. Then I will slice it into triangles for easy eating!

(1/4 cup is 68 calories)


This one just screams football to me. I really love buffalo dips with celery. I feel chips make it too salty most of the time. 


Cajun Burger Bites
(1 burger is 80 calories)


This is probably the main course of the evening. I personally LOVE dips so I have a hard time walking away from them, but variety is the spice of life! 


If anyone wants to join me in making these yummy recipes this evening, I have compiled the grocery shopping list (in order of department) in the link below.


I hope you all have a fun time watching the super bowl and GO FOOTBALL!!! (Notice I am not voicing who I am rooting for?? I think there is enough of that on facebook as it is! Speaking of facebook-- Please like our page at: https://www.facebook.com/Between3Sisters)


Like this post?

Thursday, December 5, 2013

Easy Chocolate French Silk Pie

If you like a good rich, silky Chocolate French Silk pie, this is the recipe for you! I made this recipe for Thanksgiving, it was our alternative to pumpkin pie, and it was a hit! The pie features a chocolate graham cracker crust and a very creamy, chocolatey center. The basis of this recipe came from this recipe, but I modified it using some techniques I learned at a French cooking class while in Seattle. A French Silk Pie is topped with whipped cream, but since we have a few lactose intolerant people in our family I served it on the side. I hope you enjoy!


For the Crust:
2 1/3 cups chocolate graham cracker, crushed into crumbs
3/4 cup melted butter
1/3 cup powdered sugar
2/3 cup cocoa powder

For the Filling:
1 cup of unsalted butter, at room temperature
2 teaspoons of vanilla
4 eggs (separated)
24 Dove Dark Chocolate Promises 
1/3 cup white sugar
1 pinch of salt

For The Topping
1 1/2 cups heavy cream, chilled
1 1/2 tablespoons granulated sugar
1/2 teaspoon vanilla

1. Mix chocolate graham cracker crumbs, butter, powered sugar and cocoa powder in a bowl. 
2. Press into a 9-inch spring form pan.
3. Cream the butter in a large bowl until smooth.
4. Melt the chocolate in the microwave. (You can use a double boiler but I usually just put it in the microwave for 1 minute, stir, and keep cooking for 30 seconds increments until melted. Do not over cook the chocolate in the microwave....it happens.)
5. Separate the egg yolks from the whites.
6. Once the chocolate is melted,  stir in the yolks, vanilla, and sugar. Pour this mixture into the butter and stir well. 
7. In another bowl, add the egg whites and a pinch of salt. With a mixer, beat them on high until white peaks form. 
8. Fold the egg whites into chocolate mixture. 
9. Spoon the chocolate filling into the prepared pie crust and chill in a refrigerator for at least 2 hours or overnight to set up. 
10. For the whipping topping, beat heavy whipping cream on low for about a minute. (Make sure it is cold or it will not work. Also, make sure your bowl & beaters are room temperature or cooler.)
11. Increase the speed to high and add in sugar and vanilla. 
12. Keep beating cream until stiff peaks form. I like to make it very stiff, so I usually use the mixer for a good 5 minutes. 
13. Top the pie with the whipped cream or serve it on the side.
14. Enjoy!!


I hope you all had a great Thanksgiving and hope you have a great Christmas & New Year!!


Like this post?


Thursday, October 24, 2013

Pumpkin Oatmeal Breakfast Bar

The other day I was shopping at Costco and picked up a box of these Quaker Soft Baked Bars for the kids (and me) to eat for breakfast.


I am not going to lie, they aren't that bad, but they are soooooo sweet! Too much sweetness for me to eat in the morning!

  This morning I decided to try creating my own version of a breakfast bar, but not a too sweet breakfast bar. Since it is fall I decided to go with one of my all time favorite cooking ingredients --PUMPKIN! 

The best part of this breakfast bar recipe is that there is NO SUGAR in them! I guess that might be overstated a little. There may be no added sugar but they do have some sweet things in them to make them delicious, but not too sweet like the above packaged ones. The bars get their sweetness from pure maple syrup, dried cranberries, and 70% cocoa chocolate chips. 

Pumpkin Oatmeal Breakfast Bar

1 can (15 oz) of Pumpkin
1/3 cup Pure Maple Syrup
2 teaspoons Cinnamon
1 teaspoon Nutmeg
3 cups Old Fashioned Oats (not quick cooking)
1 cup Almonds, chopped
1/2 cup Died Cranberries
4 oz. of 70% Cocoa Chocolate, chopped

1. Preheat oven to 375 degrees.
2. Grease a 9"x13" inch pan with cooking spray.
3. In a large bowl combine pumpkin, maple syrup, cinnamon, and nutmeg until smooth.
4. Add oats, almonds, cranberries, and chocolate to the bowl. Stir well.
5. Press pumpkin oat mixture into the 9"x13" inch pan.
6. Bake for 35 minutes.
7. Allow the bars to cool before cutting into 2"x2" squares.
8. Store in a airtight container in the refrigerator.

The Skinny: Serves 20 @ 144 calories each!


Like this post?


Like This?- Pin It!

 
Copyright 2009 between3sisters