Friday, November 11, 2011

Garage Sale Redo: The Toy Box

If any of you know me personally, you know I am somewhat obsessed with garage sales and auctions. There is something about the thrill of looking through someone's junk and imagining all the possibilities in it!

I went by this garage sale about a month ago and picked up this super ugly toy box for $3.
I looked at it and thought, "This has potential to be a great toy box for Aiden!" I am slowly working on a firetruck theme in his room and I could see this toy box red and white to match the new theme.
I had some white paint already on hand, so started with painting the entire toy box white. I picked up this Rust-Oleum Sunrise Red paint at the hardware store for about $13.
I purchased some wooden letters from Hobby Lobby ($1.50 each) and used the paint to paint them red. I also painted the legs and handles of the toy box the same red color.
When I painted the top, I noticed how bad of condition it was in. The toy box does not have normal wood on the sides and top. It was almost like some type of textured particle board. Anyways, the top looked terrible, so I decided to make it a cushion. (Secretly hoping that some day my little guy would climb up on top and maybe curl up with a good book.)

I purchased some 2" foam ($7) and a yard of fabric ($6) also from Hobby Lobby (I LOVE that store!). I removed the lid from the box and cut the foam and fabric to fit the top.
Laying out the fabric, foam, and top-- I stapled the fabric to the lid.
The bottom looked terrible after the staples, so I used the extra fabric to cover up the rest of the lid. I adhered it to the lid using fabric glue (lots and lots of fabric glue!)
If I planned on my little guy sitting on this toy box someday, I knew those wheels would need to go. They barely wheeled around and I am pretty sure any weight on them would have broke them. So I needed to remove them. I removed two with ease, it's just a matter of pulling the wheels out of the holes, but two of the wheels were stuck in there forever! I worked on the wheels for hours and not one of the remaining budged! Eventually, I decided to take a different route and bring power tools into the mix. I used my angle grinder to saw off the remaining wheels.
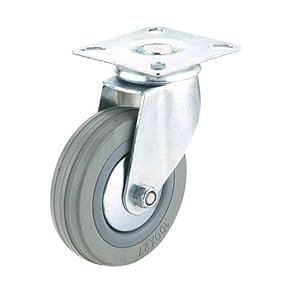
I decided to install these wheels with a plate caster to cover up the holes from the previous wheels ($7 for the set).
Also, to prevent any smashed fingers, I installed a toy box hindge ($5).
I reattached the lid and glued the wooden letters to the box with some wood glue. The results were AMAZING! You would have no idea this was the same toy box I picked up at that garage sale!
Here is the toy box open and full of toys!
The before and after:
Total Cost of the toy box:
Toy Box ($3) + Paint ($13) + Letters ($6) + Foam ($7) + Fabric ($6) + Wheels ($7) + Hinge ($5) = $47.00

Not the cheapest redo project, but I still have foam, fabric, and paint left over for some other projects! And you know what, my son LOVES his toy box! It's the perfect height for his size!
I guess the moral of my story is, go garage sale shopping! You never know what you will find and with a little creativity, what you can turn it into!

Do you have any awesome garage sale redos? If so, I would love to have you link them below in the comment section!

~Beth


Wednesday, November 9, 2011

Easy Cranberry, Chocolate Chip, Oatmeal Bars

One thing I love about fall is football Saturdays! I love when my husband is off work, so we can enjoy watching our favorite football team play. (GO BIG RED!!!) My friend Amelia invited us over to watch the game at her place and she cooked up some delicious brisket (which I hope she posts the recipe on her blog.) I offered to bring the dessert. I made two different types of cookies and both were a hit! I am sure you have all seen/tried/tasted Starbucks' Cranberry Bliss Bars, well I didn't have white chocolate so I came up with my own recipe adapted from a few knock-offs I found for the Starbucks version. I love cranberries with any type of chocolate and these bars were super easy to make, so enjoy!
source -sorry I forgot to take a picture

1/2 cup melted butter, softened
1 cup brown sugar
1 cup white sugar
2 egg, beaten
1 teaspoon vanilla
1/2 teaspoon baking powder
1/2 teaspoon baking soda
1/2 teaspoon salt
2 cup flour
3/4 cup dried sweetened cranberries
3/4 cup rolled oat
3/4 chocolate chips

Directions:
1. Preheat oven to 350 degrees.
2. With a mixer, blend butter until somewhat smooth.
3. Cream together butter and both sugars.
4. Mix in vanilla and eggs.
5. In a sifter (I like to use a sifter instead of dirtying another bowl) add flour, baking powder, baking soda, and salt. Sift into bowl with butter and sugar mixture. Stir.
6. Add the cranberries, oats, and chocolate and stir with a spoon. The dough will be quite stiff.
7. Line a 9"x13" baking pan with foil. (You don't have to do this, I just like to because it makes it easier to remove the bars.) Spray the foil with vegetable spray.
8. Spoon in the mixture and spread evenly in pan.
9. Bake at 350 degrees for about 30-35 minutes. Just check to make sure they are a golden color.
10. Cool and then cut into bars.

~Beth


Sunday, November 6, 2011

Sophistication Sundays - Latest Product Raves & Reviews

My Sophistication Muse, Audrey Hepburn
Sophistication Sunday revolves around my favorite beauty finds, techniques, fashion trends and anything else "pretty" that catches my eye. I look forward to sharing these ideas with you and hope to hear your suggestions and feedback as well! I am no expert at beauty or fashion by any means but perhaps that will make my thoughts more relatable. Simply put, I'm just a girly-girl navigating my way through the fabulous finds I come across.
...

I decided that after my absence in Sophistication Sunday posts that I should spend a little time talking about my new favorite products. Just when it seems I've completed my beauty arsenal there are a few more things I add to the mix!

First up, I have to review my new favorite eye shadow palette. I am SERIOUSLY in love with this thing! No, it's not new to the blogger world (as I have been reading about it for months) but it took me a long time to break down and buy it.


The Urban Decay Naked Palette:

(Photo Source)

*Angels Singing*

As I said, I had heard great things about this in the internet world but because of the price tag hadn't tried it myself. When my girlfriends and I recently took a trip to NYC one of them (a makeup fanatic like myself!) had the palette and I just had to try it out. I was quickly sold on the quality of the shadow and since I had saved spending money for NYC I figured I could justify the purchase.

Unfortunately, every Sephora we went to was sold out!... NOOOO!!!!


(Photo Source)

Okay I didn't quite react like that but I was disappointed. *sad face*

Luckily when I returned to South Dakota - there it was! Waiting in stock just for me, at Sephora. Yippee!!!! And the rest is history.

Seriously though, this stuff is AMAZING!
I am usually changing eyeshadows all the time and searching for the perfect neutral.
This palette is packed with 12 beautiful neutrals that go on like a dream! If you'd like to see them "swatched" here is a great post from Beauty Deviant.

A lot of the shadows I've used are powdery and lack pigment when I actually apply them. In other words they look great in the pan but don't really show up when I try them out.
This quality Urban Decay shadow is the perfect balance. It shows the color and amazingly enough looks great on everybody! Those Urban Decay people are GENIUS, I tell ya.

You can find this in stores (or online) at Sephora for $48. As I said before, I couldn't imagine paying the price initially but I honestly haven't used any other eye shadow since I purchased this. It is well worth the money and will last a very long time. Love it!


Another new beauty product on rotation is:

Physicians Formula Mineral Correcting Primer


Some of you may remember my initial post about foundation primer here. Since that post I've still been on the hunt to find my favorite primer. I decided that if I could make my own it would lack the odd smell of E.L.F.'s primer, have the color/coverage of Rimmel's and the lightness & fast-absorption of Smashbox's. BUT until I'm able to make my own line of foundation primer (ha!) Physician's Formula will have to do.

I purchased this in "nude" for some coverage but it also comes as a pink highlighter or green corrector. It doesn't provide the coverage I like but it is better than the completely clear primers. My biggest problem with the product is the container. I'm not a huge fan of the brush application and usually just twist it up, wipe the brush on my fingers, and then apply the primer. So it's not great but it works and retails for around $10 and so far lasts much longer than Rimmel's.

All in all I give it a B-


Last but not least I thought I would end on a hair product high note.
And surprise, surprise it's another find from the Organix brand.

and this newest addition is just as amazing.


Organix Shimmering Keratin Oil

Organix Every Straight Brazilian Keratin Therapy Shimmering Keratin Oil

When I saw this on their website I was anxious to try it! Unfortunately I couldn't find it in any of the normal stores. I decided to order a few things from Ulta that I couldn't get in town and added this to the mix.

The first morning I tried it I overdid it a little bit! I didn't think it would be so potent and quickly learned a little goes a long way with this product. In other words, don't spray too much or it makes your hair greasy! Just a couple sprays up the shine factor and provide smooth results. My favorite way to use the product is to spray it in my hand and rub it on the ends of my hair after I've finished styling it. It cuts down on frizz and helps leave strands smooth and shiny. Best of all, like the other Brazilian Keratin products, it smells heavenly.

It retails for around $6 and I am happy to report that I spied it on the shelf of one of the big box retailers today. If it made it out to the Midwest it should be at a store near you :)


Have you tried any of these products or any new ones worth trying? Let me know in the comment section below!

~Christi


Saturday, November 5, 2011

Spicy Chicken Tortilla Roll-Ups

By now you've all probably read about Beth & I's obsession with Pinterest. One of my favorite things about Pinterest is the ease in which you can find delicious and easy recipe ideas.

When we had a family potluck to welcome our cousin's new little baby to the family I knew I wanted to try something different and delicious. While perusing the recipes on Pinterest I found Spicy Chicken Tortilla rolls and promptly pinned it.

Pinned Image

The recipe was originally pinned from Homemade at Holman who adapted this recipe from Sing For Your Supper. Definitely a blog I will be keeping an eye on for other ideas because this recipe was delicious!


Spicy Chicken Tortilla Roll-Ups

1.5 lbs boneless, skinless chicken breasts
1 can Ro-tel diced tomatoes,
drained 12 oz cream cheese, softened
1 cup shredded cheddar or monterey jack cheese
1 clove garlic, minced
3 tsp ancho chili powder
1 tsp cumin
1/2 tsp cayenne pepper
1/2 tsp garlic salt
1/4 cup cilantro, chopped
6 scallions, white and green parts, chopped
6-8 large flour tortillas

Season the chicken breasts with salt, half of the cumin, and 1 tsp of the chili powder.


Add chicken to a skillet and add about 1 cup of water.


Cover and cook on med-high heat until cooked through. Add more water if necessary.
Once the chicken is cooked, cool slightly and shred with 2 forks.

In a mixing bowl, combine cream cheese, drained tomatoes, cheese, remaining spices, garlic, cilantro and scallions. Mix together until well-incorporated.


Add cooled chicken and stir together.
Lay out tortillas and divide mixture evenly in the center of each.
Spread into a thin layer leaving the edges clean.


Roll each tortilla tightly.
Do not fold in the ends like you would with a burrito but leave them free.
Use a sharp knife to cut into 1" thick slices and transfer to a serving platter.


Cover with plastic wrap and refrigerate until ready to serve.


The rolls were a hit! They were eaten up quickly and provided just the right amount of kick.

Now what to do with all the left over tortillas?...


~Christi


Thursday, November 3, 2011

DIY Pallet Shoe Storage Bench ($32.13)

With the onset of winter I have been drooling over some sort of shoe storage in our house. Right now, shoes get left at the door and I end up tripping over them every time I walk in. I can't imagine with winter, not only will I be tripping over them but I will be stepping in pools of water too!
I HATE wet socks!

I began looking online for a shoe storage bench. I found something like this for $112.

buy it here

Or I found this one, which is super cute, but a little out of my budget.
buy it here

I fell in love! It would be so nice to have a coat rack, some storage, and a shoe bench in my mud room!

However, I know my husband, and he would probably say that we really don't need it for that price. So one day, I decided that I could build my own. As of late, I have been obsessed with wooden pallet furniture. I thought that some pallets would make a great shoe storage bench....and they did! So here are the directions if you would like to build your own storage bench.

Start with two pallets. Try to get the exact same pallets and some pallets that are in fairly good condition. Also, try to find pallets that use 2"x4" construction for the middle board. The bench finishes at 48"x18".
You will need:
(1) - 1"x6"x 12' long cut into 48" lengths (The top, 3 cuts)
(1) - 2"x4"x 6' long ripped down the middle cut into 18" lengths (Center supports- 8 cuts)
(1) - 2"x4"x 12' cut into 18" lengths (Side supports- 8 cuts)
(1) - 2"x4"x 12' milled down to 3" wide (optional) cut into 18" lengths (Bottom Side supports- 8 cuts)
Circular Saw (This is a great one here)
Drill (Seriously the Dewalt Hammer Drill is my fav!)
Lots of screws
Hammer
Chisel
4 casters

Turn the pallets over and remove the bottom.
I did this with a chisel and hammer. I just chiseled around the nails and then used the hammer to pull them out. You want to remove the bottom to extend the spaces between shelves for bigger shoes.
Your pallets should look something like this:
Next, cut them both in half the width way. Make sure you measure so they are all even pieces. Measure twice!
Now, most likely, your circular saw won't cut all the way through the thickness of the wood, so I used a hand saw to cut the remainder.
You should have four equal sized pieces of the pallet. Stacked on top of each other, you get the idea of how the bench will look. At this point, decide which side you want to face front and the order you would like to stack the pallets. I had some ends that were cracked on my pallet so I faced them towards the back. Also, I put the best quality shelves toward the top of the bench because I figured you would see them more.
Now we need to reinforce the bench shelves to be strong enough to hold a person's weight. Measure the width of the pallet.Taking a 2"x4" board (the reason why the pallet needs to be 2"x4" construction) cut 8 pieces of the board into the width of the pallet (18 inches).
Starting with bottom half piece, attach the 2"x4" along the outside edges of the pallet, like below. I used screws to do this.
Turn the pallet over (this is your bottom rung) and measure the width of you two boards. The height of a normal pallet space is not tall enough for most men's shoes. I needed to expand this, so I did so by adding boards to the top of the supports.

You will need to measure the edges (the 2"x4" you just screwed on) and the width of your middle supports. (If using a 2"x4" pallet, it will be about 3", hence the milled board above.) You don't have to do this if you don't want to. I just didn't want any overhang, but you could easily center the height extension boards. Cut the boards down to 18" long, there will be eight cuts.
Each shelf also needs some center support boards, so I cut two center supports for each shelf and two end supports for each shelves.

You should end up with
6- 2"x4"x18" boards (2 were already used)
8- 2"x2"x18" boards
8- 2"x3"x18" boards (unless you didn't mill down the boards)

Here's my cut pile (and my son's shoes):
Next, screw your center supports into place:
Starting with the bottom shelf, screw the two 2"x3"x18" boards to the tops of each of the edges. (Note: If you plan on finishing the bench, this is the part I wish I would have sanded the bench. It was very hard to sand the bench once all the shelves were put together.)
Now, stack your next pallet shelf on the bottom. Use the pallet overhang to screw it in place to the shelf below.
You should have something like this:
Place your 2"x4"x18" side piece on the pallet overhang and then put the top 2"x3"x18" piece on the top of the ends. You are using your 2"x3"x18" to hold the side piece in place. You need to screw down the top piece (2"x3"x18") to hold the side piece in and to attach to the shelf. (Note: I drilled a hole and then screwed in the screw. I just found it easier and I didn't want to split the wood. I wasn't sure how the pallet would would hold up to just drilling a screw in.)
Repeat the process. I used very long screws because I wanted to make sure that the screw went all the way through the shelf, into the side piece of the shelf below.
You should end up with something like the picture below. (You might want to use clamps if your boards are bowed a little.)
Now it's time for the top. I purchased a 1"x6" pine board for my top. I didn't want anyone snagging their clothes on the rough pallet wood, so I thought the top should be smooth. Measure the width of your bench, in my case it was 48" (including the overhangs on the side), and cut your board into 3 pieces.
Place your boards across top of the bench (there will be gaps in between them) and mark your drill marks. I decided to nail on the top, to add sort of a rustic feel. I had some large roofing nails that I liked the look of, so I used them. I did drill holes part of the way before putting the nails in so I was easier for me and I didn't dent the wood.
You should now have a bench that looks something like this! Now you have to flip it over to add the wheels.
I added wheels to mine, to make it easier to cleaning under.
I bought these casters from Amazon.com and they are suppose to hold enough weight for the bench. I am proud to say that this is the only step I had to ask my husband for help on. I can't lift the bench to flip it over by myself!
After sanding (for weeks), staining, and applying the polyurethane, the bench is finally finished!

The total cost: Pallets (free) + wheels ($18.88) + boards ($13.25) +Stain (free, already had it) + Screws & Nails (free, already had them) = $32.13

Not too bad if I don't say so myself!


In addition to the bench, I found plans for an above storage and coat hook organizer from ana-white.com. (Here are the plans: Ana White Entryway Storage Shelf with Hooks) I don't know if you have seen her site, but I am in LOVE with it!

It was very easy to build and cost about $25.
Finally, my mud room coat and shoe storage is complete!
We have had several people over since building it and I have actually had to convince people that this bench was built from pallets. It's a great way to use up some old pallets and add less to our dumps. Plus, it's cheap and easy!

Now onto the next project, which will look something like this:
buy it here

I am building a 15 shelf, 84" tall wine rack that should hold about 120 bottles of wine! One shelf is assembled already, only 14 more to go!

~Beth


Like This?- Pin It!

 
Copyright 2009 between3sisters