Monday, February 18, 2013

Concealing Under-Eye Circles in 3 Easy Steps

It seems like I've been battling dark circles ever since I started wearing makeup.  Over the years I've tried numerous concealers and eventually found my match in MAC's Studio Finish Concealer.  You can read all about my undying love for it here


However, I wanted to write an update because I've developed a little under-eye circle "routine" that I am very pleased with.  It's a three step process that can be duplicated with either drugstore items or high-end products.  

Step 1:  Brighten

I've tried numerous neutralizers and different correcting shades but brightening the under-eye area seems to provide the best foundation for treating dark circles.  

The product I use for this step is Maybelline's Instant Age Rewind Erase Dark Circle Treatment Concealer (holy moly, what a mouthful!) in the shade, you guessed it, "brightener"  (the pink-ish shade).  If you prefer a high end alternative, try Benefit's Eye Bright.


To use the product you just turn the base (and it makes that click-click-click sound) and the liquid comes up through the sponge applicator. From here you can just dab it on under your eyes in a triangle pattern (one corner at your inner eye, the second corner at your outer eye, and the third corner pointing down towards the tip of your cheek) and blend. Quick tip: after using this product for a little while I realized that the sponge soaks up a TON of the makeup. So in my effort to be cost effective I ripped off the sponge applicator. Now I just need a couple clicks to get the amount of product I need.  I apply it right to my fourth finger and tap and blend it under my eyes.  


Step 2:  Conceal

For this step feel free to substitute your favorite concealer.  I of course turn to my MAC studio finish.  The price is a bit steep at $18.00 but as I've explained before, I used to buy concealer that was $7 a pop and I would have to buy it probably once every 1-2 months.  This concealer lasts me a YEAR at a time, covers blemishes as well, and is more than cost effective considering how frequently I was having to buy drugstore concealer.

I simply dab my fourth finger into the pot and then pat it under my eyes and blend.  I think one of the keys to this is to remember that more product does not mean better coverage.  A lot of people don't like the MAC studio finish for under-eye coverage but I find using just a little goes a long way and as long as you don't cake it on.  Love it!


Step 3:  Set

For this final step I use ELF's Studio High Definition Undereye Setting Powder.  This lovely little product clocks in at $3.00.  Woo hoo!  If you're looking for a high-end option I've heard good things about Bare Minerals Well-Rested SPF 20 Eye Brightener.  


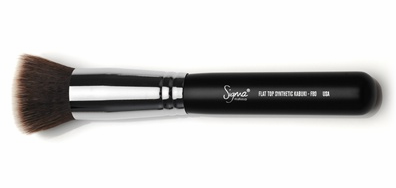
To finish off the coverage I use my Sigma F86, dip it into the pot, tap off the excess, and dab under my eyes (from inner corner to outer).  I find this last step really prevents that annoying crease under the eyes and sets my under-eye makeup for the day.  


Truth be told, I don't do this every day (because sometimes I'm lazy, obviously) but I do find this is the best way to deal with my dreaded dark circles and thought I would share it with you guys!

Do you have any tips for concealing under-eye circles?  Share below!  


~Christi


Monday, February 11, 2013

Lime & Avocado Pork Tacos

Everyone loves a good Mexican dish, but usually it comes with some SUPER high calories. Not these yummy Lime & Avocado Pork Tacos! Cooking the meat in a crockpot helps retain the pork's juiciness  The lime adds just the right kick to compliment the spice of the jalapeno and buttery texture of the avocado. At 384 calories for 2 tacos, this will be one Mexican dish you will for sure repeat!

1.5 pounds pork loin filet, cooked
1 tablespoon of olive oil
2 tablespoons taco seasoning mix
1 tablespoon cumin
1 teaspoon of pepper
1/2 cup water
1 onion, sliced thin
1 jalapeno, seeds removed and sliced thin
1 lime, juiced
1/2 cup cilantro, chopped
1 tomato, diced
1 avocado, sliced in strips
12 corn tortillas

1. In crockpot, place pork loin and cook on low for 6 hours. Shred when cooked.
2. Heat a olive oil in a large nonstick skillet. Add pork, taco seasoning, cumin, pepper, 1/2 cup water, onion and jalapeño to pan; sauté 8 minutes or until tender.
3. While pork is cooking, heat oven to 400 degrees. Place corn tortillas on cooking stone or baking sheet and cook 5 minutes. Turn over and cook 5 minutes more.
3. Stir in cilantro and lime juice; cook pork until warm.
4. Serve tacos by topping corn tortilla with pork mixture  chopped tomato, sliced avocado  and some chopped cilantro. Enjoy!


The Skinny: Serves 6 (2 tacos each) for 384 calories

source


Like this post?

Thursday, February 7, 2013

DIY: Valentine's Day Heart Bird Feeder

Is there anything sweeter then a little boy and his Grandma?? Or in my son's case his Farmor? There is! And that is watching them make these super cute heart shape bird feeders together!

Here is what you need to make these super cute bird feeders ---btw a GREAT gift idea for Valentine's Day! 

1 1/2 cups of birdseed
2 (1/4 oz) packages of unflavored gelatin
heart shaped cookie cutters
cooking spray
wax paper
twine

Step 1:  Mix 1/2 cup of water and gelatin together in a bowl.

Stir until dissolved.


Step 2: Pour in 1 1/2 cups of birdseed.


Step 3: Measure about 7 inches of twine out and cut it.

Tie the twine in a knot to make a loop.

Step 4: Lay heart shaped cookie cutters on some wax paper and spray with cooking spray.

Step 5: Fill the cookie cutters half full of the birdseed mixture.

Step 6: Press the birdseed down into the cookie cutter.


Step 7: Lay the twin loop on the birdseed.

Step 8:  Top the twine with more birdseed until cookie cutter is full.  (Look at those cute little hands!)

You will end up with a couple really cute heart-shaped filled cookie cutters.

Step 9: Let the cookie cutters dry for a few hours and then gently unmold the feeders. Let the birdfeeders dry for another 72 hours until hard.

 Step 10: Find a nice spot, preferable near a window, to hang your finished heart bird feeder.

And enjoy the view as you show the birds in your neighborhood some love!!!


Like this post?

Monday, February 4, 2013

Organizing Under The Sink

A few weeks ago I came across this post on Pinterest on how to organize your house one day at a time from www.mysimplerlife.com. The idea was simple-- each day of the year have one very small task to complete for a decluttered home. I decided to give it a try. I don't necessarily follow her calendar in order (especially since it's from 2012), but one task a day is my goal. 

One day I was doing the dishes and noticed how under the sink in my kitchen was a mess! 

I hate having to dig in this cupboard to find my cleaning products, scrub brushes, or large bottles to refill my smaller bottles. This NEEDED to be organized!

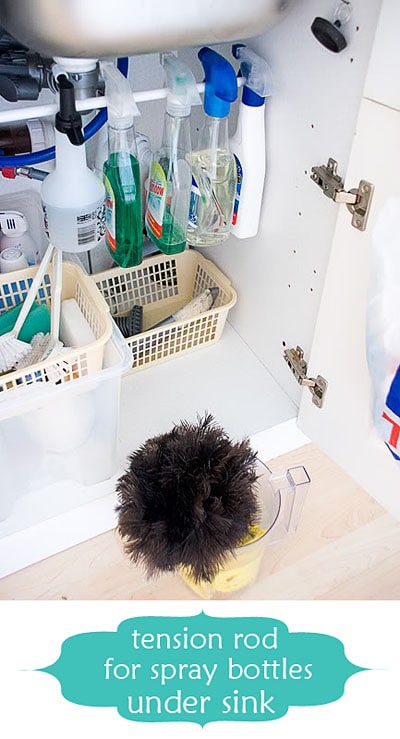
I came across this picture from tidymom.net and thought it was such a great idea to keep bottle organized and arranged nicely under the sink. 

However, I have a pull out organizer that holds all of my dish towels and there is no way I could install the tension rod under my sink. I needed another idea. I was going through my bin of organizing extras and came across this $2 towel rod.

I installed the rod on the side of the cupboard and hung up a couple hooks for my brushes.  

After hanging all the bottles, I organized everything remaining from least used to most used. The least used items were placed towards the back (large soap containers to refill small container, compost filters, odd cleaning items, etc.) After rummaging through the rest of my organizing items, I was able to use a basket and a glass jar container for my dish soap.

It may not be the prettiest cupboard under the sink, but it was fast, easy, free and now ORGANIZED! 

Have a small tip that you have found that keeps your life a little more organized? I would love to hear with a comment below! 


Like this post?

Tuesday, January 22, 2013

Bow Tie Pasta and Creamy Mushroom Sauce

Bow Tie Pasta and Creamy Mushroom Sauce
My husband and I are counting our calories again and I made this recipe tonight for dinner. We were both excited at how much this dish filled us up and was so tasty!! My son kept calling it "butterfly pasta" and enjoyed it too. It will definitely be a repeat recipe of ours! 

12 ounces uncooked bow tie pasta
1 tablespoon light butter
8 ounces portobello mushrooms, sliced*
4 ounces shiitake mushrooms, sliced*
1 small onion, chopped
1/3 cup shallots, chopped
1 tablespoon minced garlic
1 1/2 teaspoons salt, divided
1/4 teaspoon freshly ground black pepper
1/4 cup white wine
2/3 cup heavy whipping cream
1/2 cup Parmigiano-Reggiano cheese, shredded
2 tablespoons chopped fresh parsley

1. Cook bow tie pasta in pan according to directions on package.
2. At the same time while cooking pasta, heat olive oil in pan.
3. Add onions and shallots to olive oil and cook until translucent, about 8 minutes.
4. Add garlic to onions and cook for 1 minute.
5. Add sliced mushrooms, salt, pepper, and white wine to onion/garlic mixture. Cook until mushrooms are tender.
6. Add cooked bow tie pasta, whipping cream, cheese, and 2 tablespoons parsley to mushrooms. Toss pasta to coat. Salt and pepper to taste if needed.
7. Serve with crusty bread on the side and enjoy!

* You can substitute any type of mushroom for this dish, just make it a full 12 ounces. 

The Skinny: Serves 6 @ 352 calories


Like this post?

Saturday, January 19, 2013

Happy (Busy) New Year!

I know, I know... a little late on the HAPPY New Year! But this Mama has been busy! It's now January 19th and this is my first post of the New Year and I will explain why.

In September, I had my second child and since then my life has been in great disarray. In addition to the challenges of a newborn, I have a crazy, energetic toddler to run after. I have felt so overwhelmed in the last few months. I somehow managed to balance two kids, working from home, keeping the house clean, volunteering for my MOPS group, making healthy meals, working out an hour a day, doing some DIY projects, and blogging for the first few months of Remy's life. However, at some point around Christmas I just felt exhausted and guilty for neglecting my children for my many activities.

At that point I made the decision to scale down my activities in this new year. My children are growing up so fast and soon they will be in school. While they are little, I want to spend all my free time playing, talking, reading, and exploring with them. I have made it a weekly goal to bring my son to library story time, play play-dough, read books, finger paint, color, pretend, build legos, and sing lots and lots of songs. (No matter how horrible of a singer I might be!)

Scaling down my activities this year means you will see me blog less, work less, clean less, build less, and craft less. This doesn't mean I won't posts blogs anymore. I have about a million blogs running around in my head on a daily basis, but I will only try to write them when my kids are napping. 

I really hope to make 2013, 2014, 2015 years where I spend as much time as I can with my kids! Before I know it (2015) my little guy will be starting school and the moments of my kids and I spending days together will be gone. 

Until  then...


Like this post?

Sunday, January 13, 2013

Top Beauty Products of 2012


Photo Source

Yes, I realize we are half way into January but it is still the first month of a brand new year!  What better way to prepare for the year ahead than to reflect upon the wonderful blessings of the previous year.  And when I say blessings, it's okay to include awesome beauty products, right?? :)

I'm always keeping an eye out for new products to add to or improve my routine. So take a moment to look through my favorite products from the past year and let me know in the comments if you found something in 2012 that you will continue to keep in your beauty arsenal.  

Favorite Foundation of 2012:  
L'Oreal Paris Magic Skin Beautifier BB Cream


Last February I blogged about BB Creams and my process in researching and eventually buying one to sample.  At this time, American makeup brands were just starting to develop their own versions of BB cream.  Suffice to say there weren't many options at the drugstore (I could only find Garnier's BB cream) and all others were out of my price range and could only be purchased at places like Sephora.  I purchased Etude House BB Magic Cream and loved that it cut down on the midday t-zone shine.  However, as the months wore on and hot weather settled in, the t-zone shine worsened (dang it!) and more importantly, the color was too light for my face.  I no longer frequent tanning beds but since I use sunless tanner it would make my face look whiter than the rest of my body.  Granted, one of the purposes of BB cream is to lighten scars and freckles through the "whitening" agent of the product, but as I said this just didn't work with the bronze goddess look I strive for in the summer months.  Lastly, I wanted the convenience of just being able to run out and buy some BB cream instead of ordering it online.  OKAY GET TO THE POINT, right? :)  As drugstore brands started coming out with their own versions of BB cream I read lots of reviews and decided to try L'Oreal's BB cream.  Basically, any other BB cream sounded like it would not work with my oily t-zone.  So for me, Garnier and Maybelline were out. 

Now the good stuff.  The L'Oreal BB cream is great because it comes in different shades and has a very light feel to it. I currently use the shade "light" and will switch the "medium" for the spring and summer.  The product actually comes out white with little beads.  When I apply it, I simply put some on my favorite makeup brush (more on that later), dab it on my face, and starting buffing it in. The white color and beads quickly mix together and provide a light wash of color over the face. 

So the main reasons I love this product?  #1 I am not a morning person and I love that BB creams and tinted moisturizers shorten my routine.  After I wash my face and put eye cream on I go right to the BB cream.  The moisturizing, priming, and tinting is all completed in one easy and fast step.  Lazy beauties rejoice!  I also like that it doesn't have a heavy or cakey feel.  I've used various foundations over the years but always gravitate back towards lighter products because I don't like the heavy feel.  This BB cream is natural looking and any blemishes that aren't covered I simply cover with some concealer.
Note: The product also claims to correct but I don't know that I've noticed any correcting abilities.  The only other thing that would be nice was if it also provided some SPF.  


Favorite Powder of 2012:

Rimmel Stay Matte Pressed Powder


If you read any of my beauty posts with any regularity you know that I am constantly trying to find a way to combat shine.  I love this powder from Rimmel because it gives me a matte, airbrushed finish.  It's a great product for setting my make up and a great powder for touching up my t-zone after work.  I wish it were in a compact so I could touch up on the go but for now I just use a big, fluffy powder brush. I have this powder in the shade, "Buff Beige" and will probably have to switch to a slightly darker shade for spring and summer. 


Favorite Blush of 2012:

MAC Powder Blush in "Gingerly"

Stepping outside of the realm of drugstore favorites, MAC's Gingerly was definitely my favorite blush discovery of 2012.  This shade, though it looks like a plain brown in the pain, is incredibly beautiful and natural looking.  It provides a nice warm flush to the cheeks that I can use year round (though I particularly love using it in Fall & Winter).  As I've stated before, some products are worth paying a little extra for.  I use this blush CONSTANTLY and I still haven't hit pan in a YEAR!  Like their Studio Finish Concealer that I adore, this is totally worth  the cost.  Oh and did I mention it stays on for hours??


Favorite Lip Products of 2012:

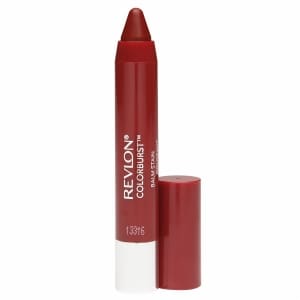
Revlon Lip Butters, Just Bitten Kissable Balm Stains.
Maybelline Baby Lips


Lip Butters


Some of you probably remember my overzealous love for the lip butters so I won't go into too much detail.  I'll just say, lip butters feel great on the lips and provide amazing color.  Basically, it's lipstick with legit moisturizing properties.  So many pretty colors to choose from, so little time.  (Color above is "Strawberry Shortcake")


Just Bitten Kissable Balm Stain

Revlon Just Bitten Kissable Balm Stain, Romantic

After the lip butter craze Revlon followed up with the Just Bitten Kissable Balm Stains.  I loved this lip product because it actually felt moisturizing and didn't leave weird lines on my lips like most stains. Whenever I tried lip stains before they wore off unevenly and made my lips feel incredibly parched.  These balm stains are smooth and shiny and leave a great wash of color on the lips.  One of my favorite ways to use this product is when I'm going for a red lip look.  I line my lips, apply the balm stain in "Romantic" (pictured above), and finish off with the lip butter in "Candy Apple."  My favorite kissable balm shades are, Romantic, Honey (great, "my lips but better" shade), Adore, and Rendezvous.

Baby Lips

I was actually late in jumping on the Baby Lips bandwagon.  I didn't see what the big draw was  and one day decided to just give it a try.  I don't have any of the colored shades but I am obsessed with Peppermint and Quenched.  Both have a great smell but more importantly the feel on my lips is amazing!  It's a great base for other lip products and doesn't ever become gummy or tacky.

Favorite Eyebrow Product of 2012:

Maybelline Define-A-Brow Eyebrow Pencil

I've cycled through numerous eyebrow products and have had plenty of mediocre brow pencils.  This brow pencil from Maybelline is now my definite favorite!  It applies easily and stays ALL day!  I use it in the shade medium brown.


Favorite Eyeliner of 2012:
NYX Slide On Eye Pencil


In a serious effort to find suitable drugstore alternatives to my high-end favorites, I stumbled upon NYX Slide On Eye Pencils.  As some of you may have remembered I was obsessed with Clinique Quickliner for years.  In fact, I still love it!  But I was determined to find a less expensive alternative.  I tried a few other drugstore eyeliners and none of them worked as well.  Too many drugstore eyeliners pull and I wanted something that didn't irritate my eyes and would glide on with ease.  I kept hearing good things about the NYX slide on pencil but when I went to purchase it at an ULTA in Woodbury, MN they didn't carry it.  I really wanted to see if this would be my new holy grail eyeliner so I found it on ULTA's website and promptly ordered one.  When the eyeliner arrived at my door it was basically love at first sight!  The color is great and the formula is creamy but not watery or runny.  It stays on all day and slides on like a dream (hence the name, I suppose!).  I use the shade "Brown Perfection" for my everyday eye looks.  I also purchased the pencil in "Jet Black" but unfortunately this doesn't stay on as well.  It really pools in the inner corner of my eyes and I HATE that.  I don't know what the deal is with that but I haven't had any other issues with the other shades I've purchased and as I mentioned, brown perfection is well... perfect!  The only other downside is that these pencils are not self-sharpening like Clinique's.  However, to me it is a small price to pay considering I am paying half the price.  I find the pencil sharpens best with an actual NYX pencil sharpener (which you can also buy at ULTA).  

One more thing, if you like playing around with fun eye colors these come in a wide range of shades and the color payoff is fantastic.  I recommend Golden Olive (a different shade but very beautiful and natural), Pretty Violet (vibrant purple), Sunrise Blue (a cerulean shade), and Tropical Green (bright, blue green shade). 


Favorite Brushes of 2012:
Sigma F80 & E40

Makeup brushes are definitely more of an investment.  Truth be told it is very hard for me to shell out cash for them.  But honestly to me they make a huge difference in the application of makeup and enable me to apply products with better precision.


This is the most AMAZING face brush for foundation, BB cream, tinted moisturizer, etc.  It has the perfect thickness, length, and texture and helps makeup to go on like butta! (er... butter)  I've used it for regular foundation and use it everyday with the L'Oreal BB cream.  This is probably the best beauty purchase I made this year is a fraction of the price of expensive brushes from brands like MAC.


Sigma E40


Photo Source

Like the Sigma F80, I use this baby every. single. day.  No joke!  I love this brush for adding the perfect amount of shadow to my crease.  It supplies just that little extra amount of dimension to my eye look.  I typically dip it in Urban Decay's "buck" eye shadow and then do a windshield wiper motion across both of my eye creases.  If I want to add a little more shading I will dip it in a darker shade, tape off the excess, and apply it to the outer corner of my eyelids and blend into the crease.  Once again, this brush is a fraction of the cost of similar MAC brushes.  Perfection!


Well that was a long list wasn't it?!!  There were just too many great discoveries in 2012.  I can't wait to see what the next year brings!

What were some of your favorites you discovered in 2012?


~Christi


Like This?- Pin It!

 
Copyright 2009 between3sisters